


During San Diego Comic Con 2016, I attended the Hideo Kojima Talk with Geoff Keighley where a video of Ludens, the Kojima Productions mascot, was revealed. Kojima also presented Yoji Shinkawa’s concept art and the process of how Ludens was created. Anyone that knows me knows that I am a huge fan of Hideo Kojima and his work and seeing him again after his hiatus from his… previous place of employment…. was inspiring. Walking out of that panel, I decided that Ludens would be my next cosplay. I didn’t want to cheap this one out though because I wanted to make a something Hideo Kojima and his team would be proud of, so I opted for creating a solid armor instead of foam. Thus started my 10 month journey where I logged over 1000+ hours for this beast.
Scultping the Mask and Helmet
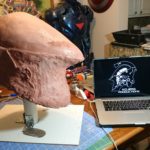
I am big on the importance of the appearance of face/helmet of any costume. I opted to sculpt the helmet and mask with clay, and then mold and cast a piece from the clay model. This was my first experience with sculpting so I would say this was the most time consuming process. I started the mask and helmet in August 2016 and didn’t finish the pieces until March 2017.
Materials (Paid links)
- Chavant NSP Clay
- Expandable Foam
- Sculpting Tools
- Stan Winston School Sculpting Techniques DVD
- Dremel
- Rebound 25
- Plasti-paste
- Epoxacoat Grey by Smooth On
- Epoxamite Fast by Smooth On
- Apoxy Sculpt
- Cardboard
Steps
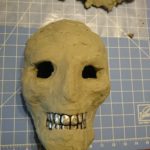
- I first made a sculpting armature to establish the general shape and provide a frame to throw the clay onto. For the mask, I modified a skeleton mask and reinforced it with fiberglass.
-

- Modifying Mask
-
- First bit of clay added
-
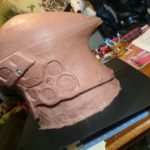
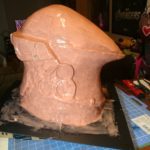
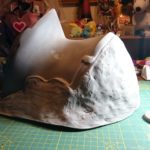
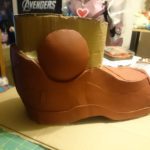
- For the helmet, I used cardboard to create a general frame around my head, then reinforced with fiberglass as well. I then filled the inside with expandable foam and mounted it to a piece of wood with pvc pipe.
-
- Building cardboard skeleton
-
- Completed Armature
-
- Expandable Foam
-
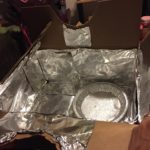
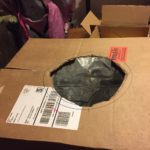
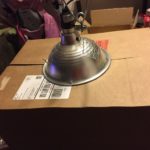
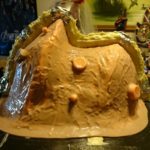
- Chavant NSP clay isn’t too easy to work with manually, so I made a heating box using an old box lined with tin foil, and a hole cut out on top to use a lamp to heat the clay. This made the material a lot more workable.
-
- Box lined with foil
-
- Hole cut
-
- Light placed to heat clay
-
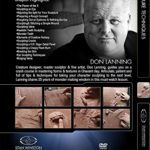
- To learn to sculpt, I watched numerous videos on youtube to pick up on some techniques. I also bought a training DVD by Dan Lanning who is a great sculptor from the Stan Winston School of Art. He goes into the tools and techniques he uses to be successful.
-
- DVD description
-
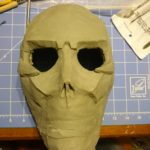
- After throwing on a bunch of clay on the armatures, the basic sculpting process is rinse and repeat. I kept using my tools to gradually remove the clay to get the shape I wanted.
-
- Pre-sculpt
-
- Midpoint
-
- Ready for molding
-
- Laying clay
-
- Midpoint
-
- Pre-mold
-
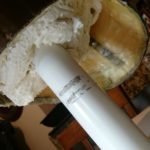
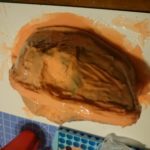
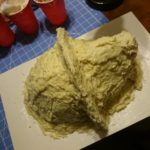
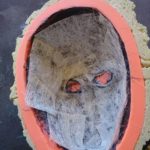
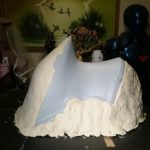
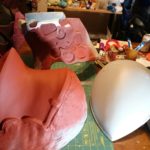
- Next I used Rebound 25 to make a silicon jacket mold of the pieces, followed by Plasti-paste to create the solid mother mold.
-
- Thickening Mold with Rebound 25
-
- Hard mother mold from plastipaste
-
- Same process for helmet
-
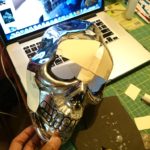
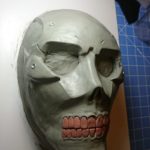
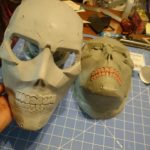
- I cast the mask using Epoxacoat Grey, fiberglass matt/cloth, and Epoxamite resin and then cleaned up the mask with body filler and sanding like I note in my Stealth Iron Man Tutorial
-
- Fiberblass over epoxy
-
- First pull
-
- Copy next to original clay
-
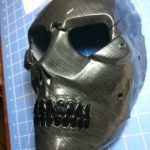
- The mask painting process was a bit unique due to its carbon fiber pattern. I used a technique called hydro dipping to get the pattern on there. After that, I cut out some plastic for the cheek detail pieces.
-
- Black paint before hydrodipping
-
- Carbon fiber pattern dipped on
-
- Cheeks added
-
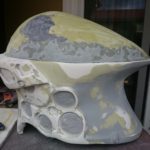
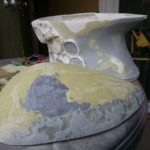
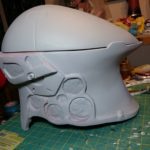
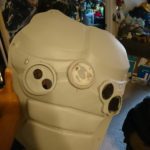
- The helmet took a few extra steps as need to make 3 separate pieces. After molding and casting the clay helmet, I cut off the top to work both pieces independently and cleaned both up with body filler/sanding.
-
- Body filler and sanding
-
- Pieces Split
-
- Ready for Mold
-
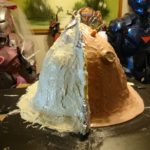
- Once the main helmet was good to go, I created 2 different molds from that piece with one being the front visor and the other being the main body of the helmet. I then casted both these pieces out and did further clean up. Unfortunately I don’t have pictures of the helmet mold but it’s more of the same
-
- Mold Prep for front shield
-
- Same process with Rebound 25
-
- Side view of making mother mold
-
- Casted piece for vacuum form
-
- Ready pieces
-
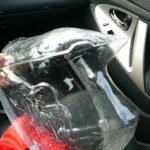
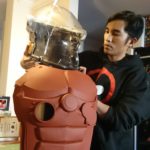
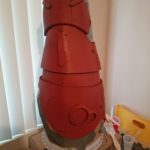
- I filled the front visor piece with plaster which made the thing end up weighing probably over 50 lbs and then had the clear pieces vacuum formed by a local shop for the front piece and a local friend from Beyond Disgusting Studios for the top piece. These were then cut out and cleaned with a dremel till I had a nice fit on the main helmet.
-
- Raw plastic front
-
- Fitting top plastic
-
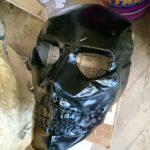
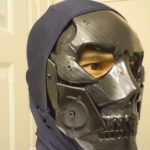
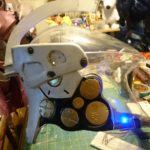
- I used Apoxy Sculpt to add the missing sections on the main helmet then threw on some paint. I then cut out some plastic to create the Mohawk and then super glued on. I also added the discs, which I will write more about later in the detail piece section.
-
- After paint
-
- Fitted visors
-


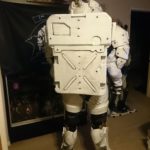
Creating the Armor from Foam to Fiberglass
For the rest of the armor, I went through the process of creating a foam piece, then creating a mold from that piece so I could cast out a hard fiberglass piece that could be sanded and cleaned up
Materials
- Foam (Click here for my old foam buying list)
- Plastidip
- Heat Gun
- Mold Max Stroke
- Plaster Bandages
- Contact Cement
Steps
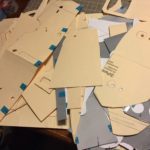
- First, I free hand patterns (similar to what I did in my Raiden tutorial which you can read here) and created basically cardboard skeletons which I modified till I got the shape I wanted.
-
- Sooo many patterns
-
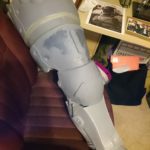
- Using the patterns, I cut out each piece in foam and used contact cement to fuse everything together.
-
- Chest
-
- Lower Leg
-
- Thighs
-
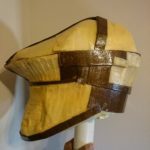
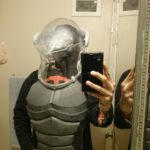
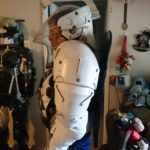
- One the structure of the piece was completed, I heat sealed each piece with a heat gun, then sealed with plasidip for good measure, then topped off with some filler primer to assist with filling some of the spots.
-
- Testing helmet
-
- Red primer with cardboard
-
- Thigh prep
-
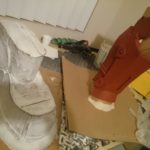
- I then prepared each piece to mold. For the foam pieces, I used Mold Max Stroke for the jacket mold, and plaster bandages for the hard mother mold since it was a little cheaper.
-
- Molds
-
- Shoe and calf
-
- Chest
-
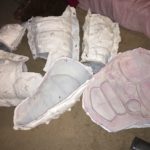
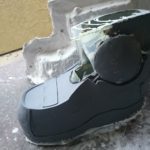
- I then casted out each piece, and cleaned them up with body filler/sanding like I did with the helmet.
-
- Chest
-
- Leg
-
- Boot
-
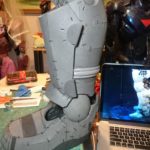
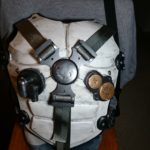
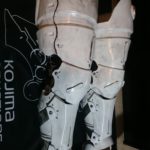
- Once each piece was good enough, I threw on some paint.
-
- Chest
-
- Legs
-
- Shoulder
-
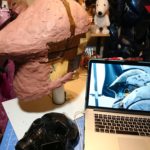
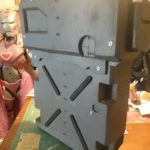
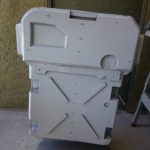
- For the backpack, I opted to keep the piece as entirely foam and used my foam painting technique that you can read here, to finish it off. Same for the spear tip to keep it convention friendly.
-
- Foam
-
- Paint layer
-
- Good paint match from back to other pieces
-


Creating the Detail Pieces
Materials
Steps
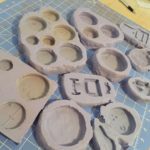
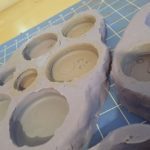
- For the various detail pieces for the armor such as the discs and clips, first thing I did was sculpt a rough piece in clay.
- I then molded each piece using the pour on mold technique. Basically I surrounded each clay model with a box and poured the Oomoo over. Below are the end result molds
-
- Various detail piece molds
-
- Closer look
-
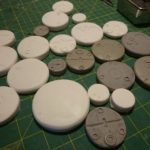
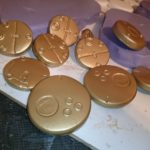
- I then casted each piece in either Smoothcast Onyx or 356. It doesn’t really matter; I just had both laying around to use.
-
- Rough Casts
-
- Since the clay pieces were not perfect, I further sanded each pieces before adding on paint.
-
- Discs discs discs
-

Mounting
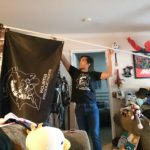
Once all the pieces were done, it was time for mounting. Since I am horrible at sewing, my friend Sharon sewed together the jacket and pants for me. I basically used the same mounting techniques I referenced in my Stealth Iron Man tutorial and my Raiden tutorial to put everything together. Had the flag printed and mounted onto a PVC pipe and it was good to go.
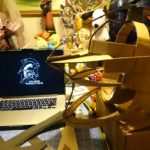
-
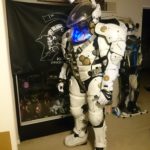
- First suit up
-
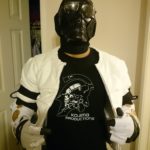
- Ludens swag
-
- Flag
-
- Legs test fit
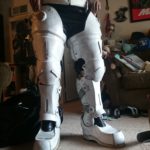
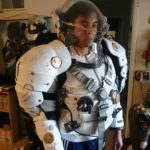
-
- Upper test fit
Suit Up
Once it was complete, it was off to E3 where I had the most amazing experience of being able to present my costume to Hideo Kojima and the Kojima Productions team. For more post, feel free to follow me on Facebook, Twitter, and Instagram.


