


Don’t mind the face… my wife is shy =P. Feels like so long ago, but for Anime Expo 2013 I made my wife (fiancee at the time) a Homura Akemi cosplay as well as the time shield. This was the first cosplay I sewed (it was an experiment!) and I couldn’t have made it without the help of Kaika and her great tutorial which you can find here: Homura Akemi Cosplay Tutorial by Kaika (The Cosplay Chronicles)
Since that tutorial was great, I want to contribute a quick and easy Time Shield prop tutorial. Total time, took about one day to make. Here we go!
Stage 1: Create Patterns and Transfer to Foam
Materials (Paid links):
- Card stock

- 1/2 inch foam mat
- Thinner Foam Sheets (For details)
- 8″ oven ring
- hot glue gun + glue sticks
- Xacto Knife
- Shield Pattern
1) First thing to do is to pattern the shield. Normally I would search google images for a good reference picture to print out and use as a skeleton, but I ran into this great diagram on deviant art by “Tanyopo” here.

Time shield pattern by Tanyopo
http://tanyopo.deviantart.com/art/Homura-Akemi-s-Shield-Outline-352584236
2) I scaled the picture and printed out a few test sheets on normal paper till it was correctly sized to fit in my oven ring.
3) Once scaled, I printed the pattern out on card stock and cut out relevant details with an exacto kinfe.
4) I used the patterns to cut out the shield details on the 3mm foamies.
5) I used the oven ring to trace a circle onto the 1/2″ foam, cut it out with an xacto knife, then glued to the oven ring.
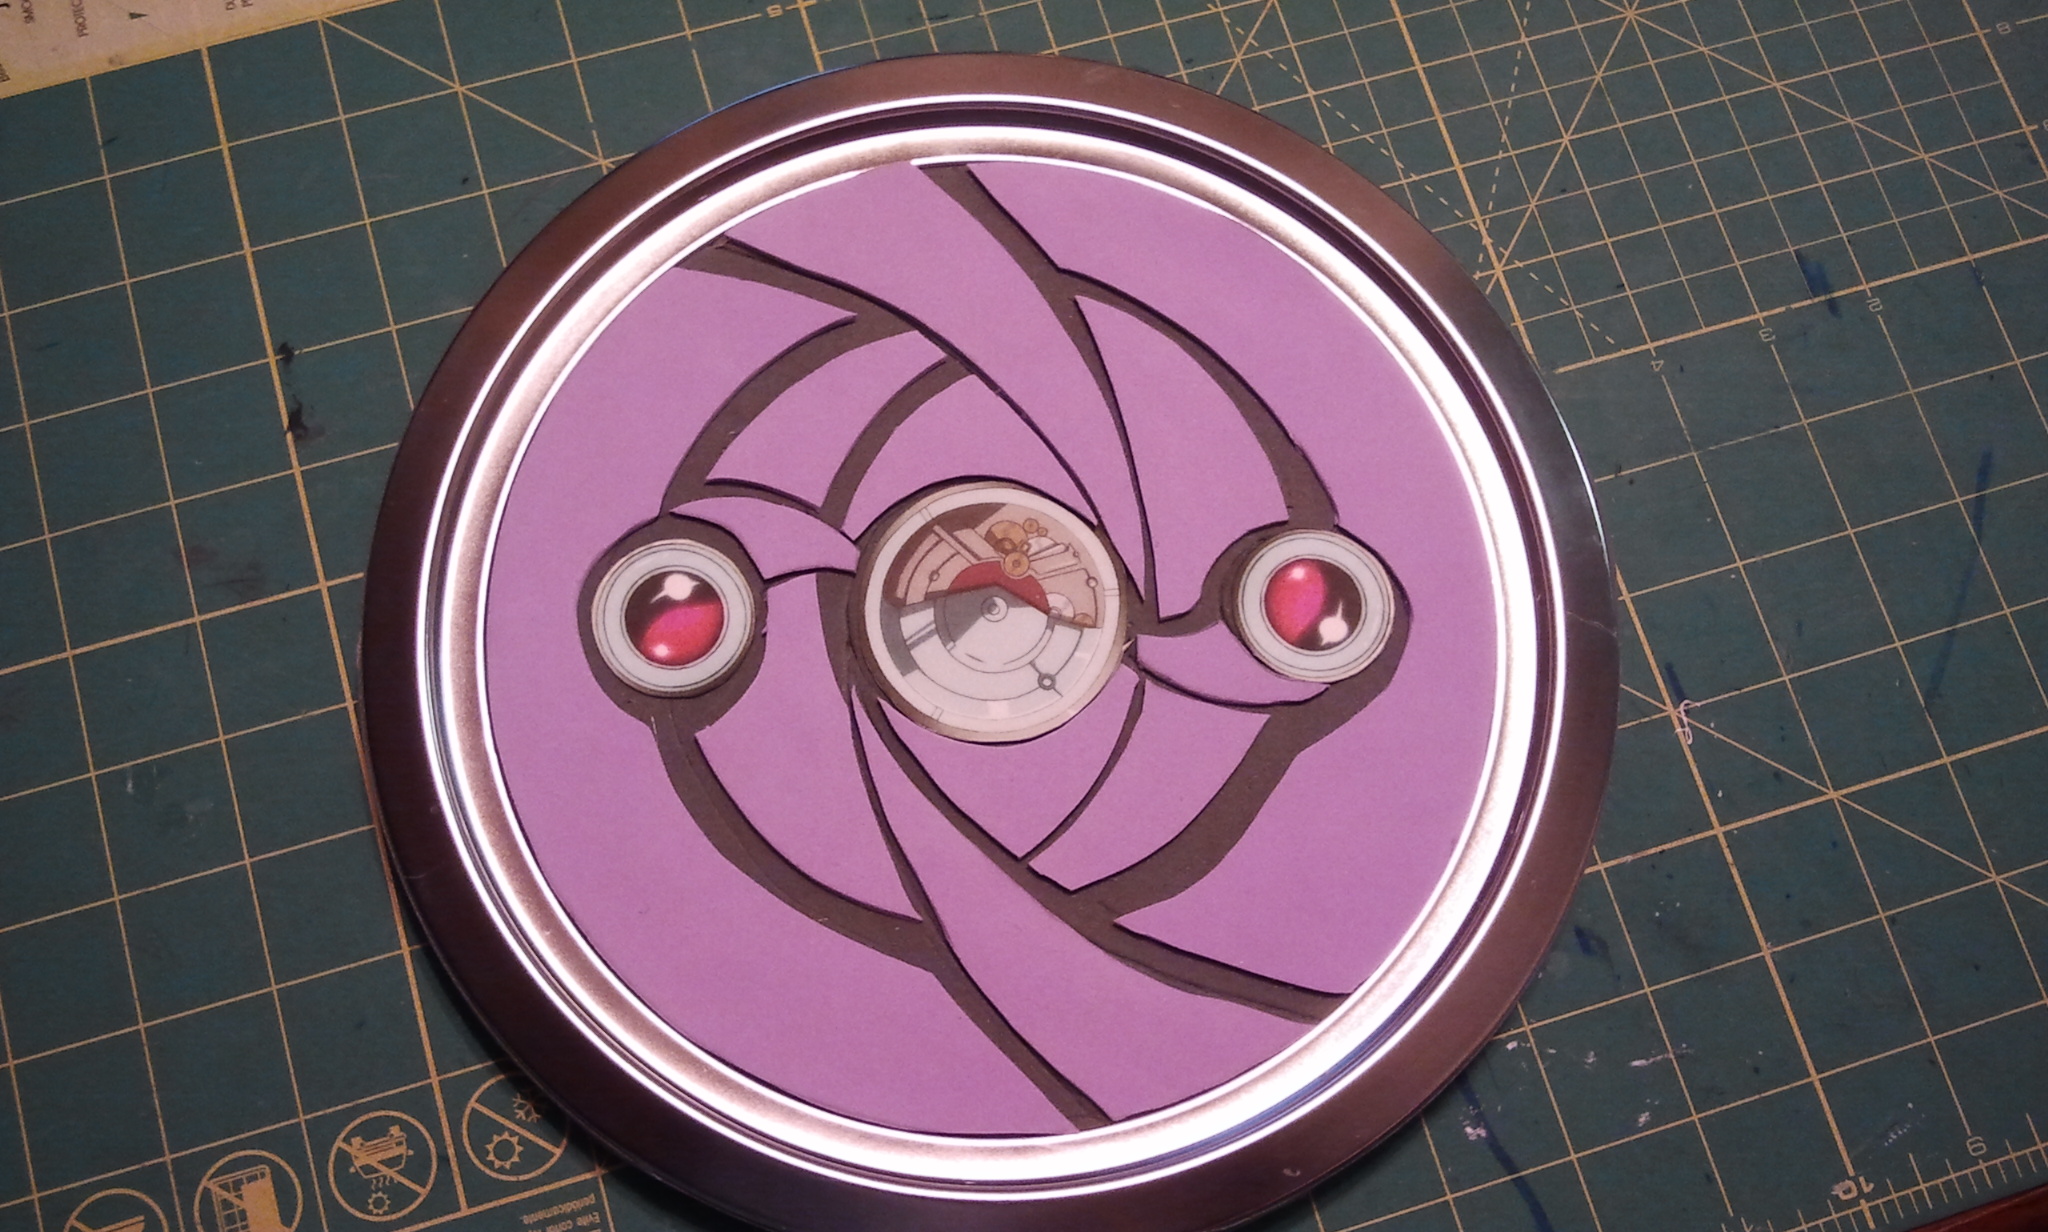
Shield with cut foam details
6) I wanted to make the time shield in “open mode” so for the sake of saving time cause I was in a rush, I took screen shots of the open shielf, printed it on cardstock, then cut out the center circle to use on the shield. Yes, very ghetto, but effective from distances a few feet away.
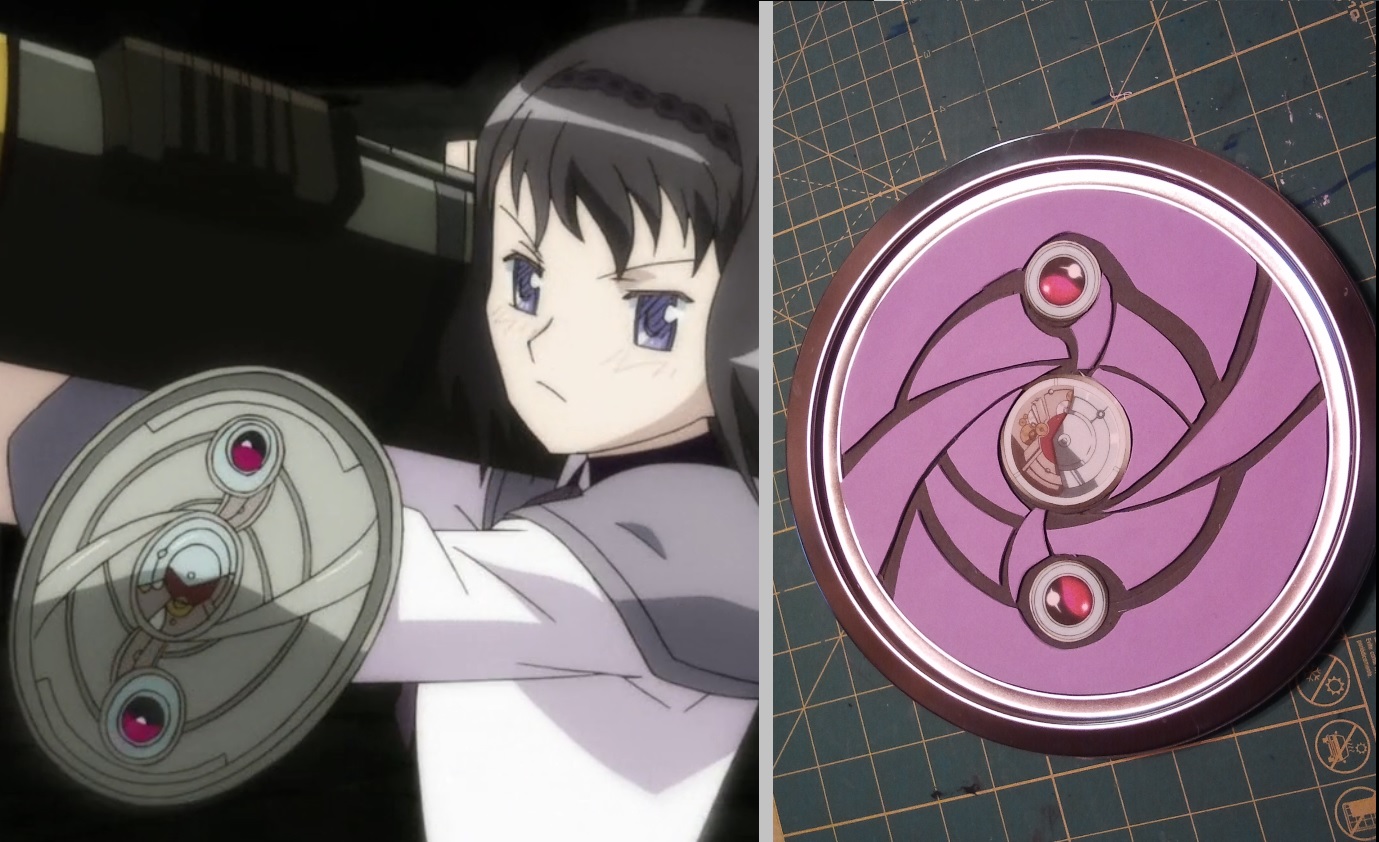
Reference vs real life
Stage 2: Seal and Paint
- Heat Gun
- Roscos Flexbond (But Mod Podge works fine if you can’t find flexbond)
- Disposable Chip Brushes
- Plasti Dip Rubber Coating Spray
- Organic Vapor Mask/Respirator
- Automotive Filler Primer Spray Paint
- Dupli-Color Gunmetal Metallic Spray Paint
- Bulldog Adhesion Promoter (Pricey but an excellent brand that adds some flex)
- Automotive Clear Coat Spray Cans
1) I sealed an painted the shield with my usual method which you can read about here:
How to seal and paint foam
2) After I painted the shield with gunmetal grey, I thought it was a bit too dark. To salvage my mistake, I used the silver leaf rub n buff all over the shield to lighten. It ended up giving it a nice weathered realistic look.
3) I used black acrylic paint with a brush to paint the gaps to make the details pop.
4) I attached the purple jewel pieces as well as the open time shield detail in the center.
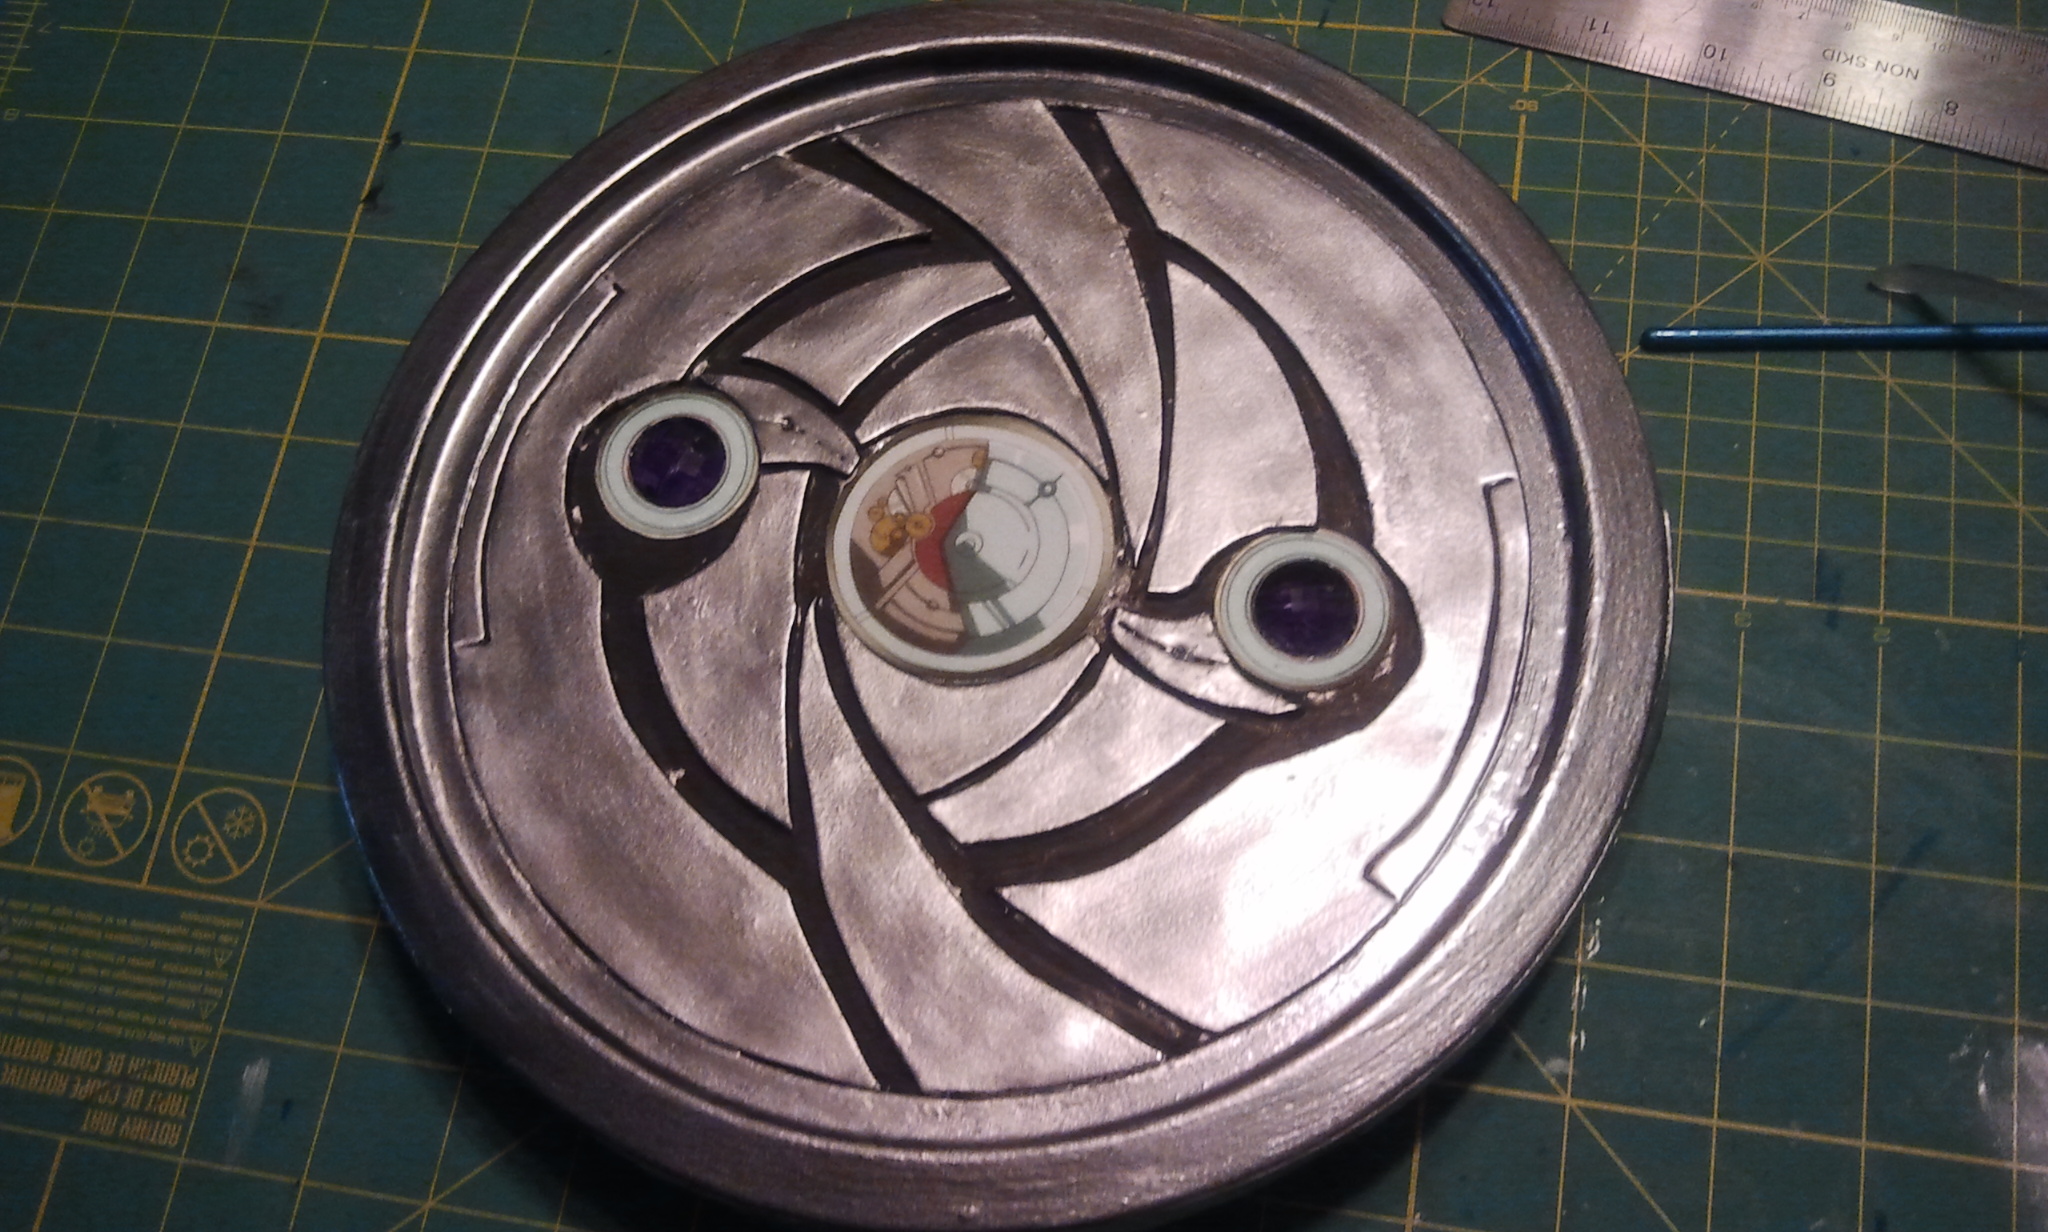
Painted time shield
Stage 3: Electronics
- Helping Hands with Magnifier
- Soldering Station
- Lead-Free Solder
- Purple LEDs
- 9v battery holder
- Purple jewels, something like these purple jewels
1) The purpose of the purple jewels was to diffuse the light. Underneath the shield, I had a hole where I glued the purple LEDs.
2) I soldered my leds to my battery holder and voila! Let there be light.
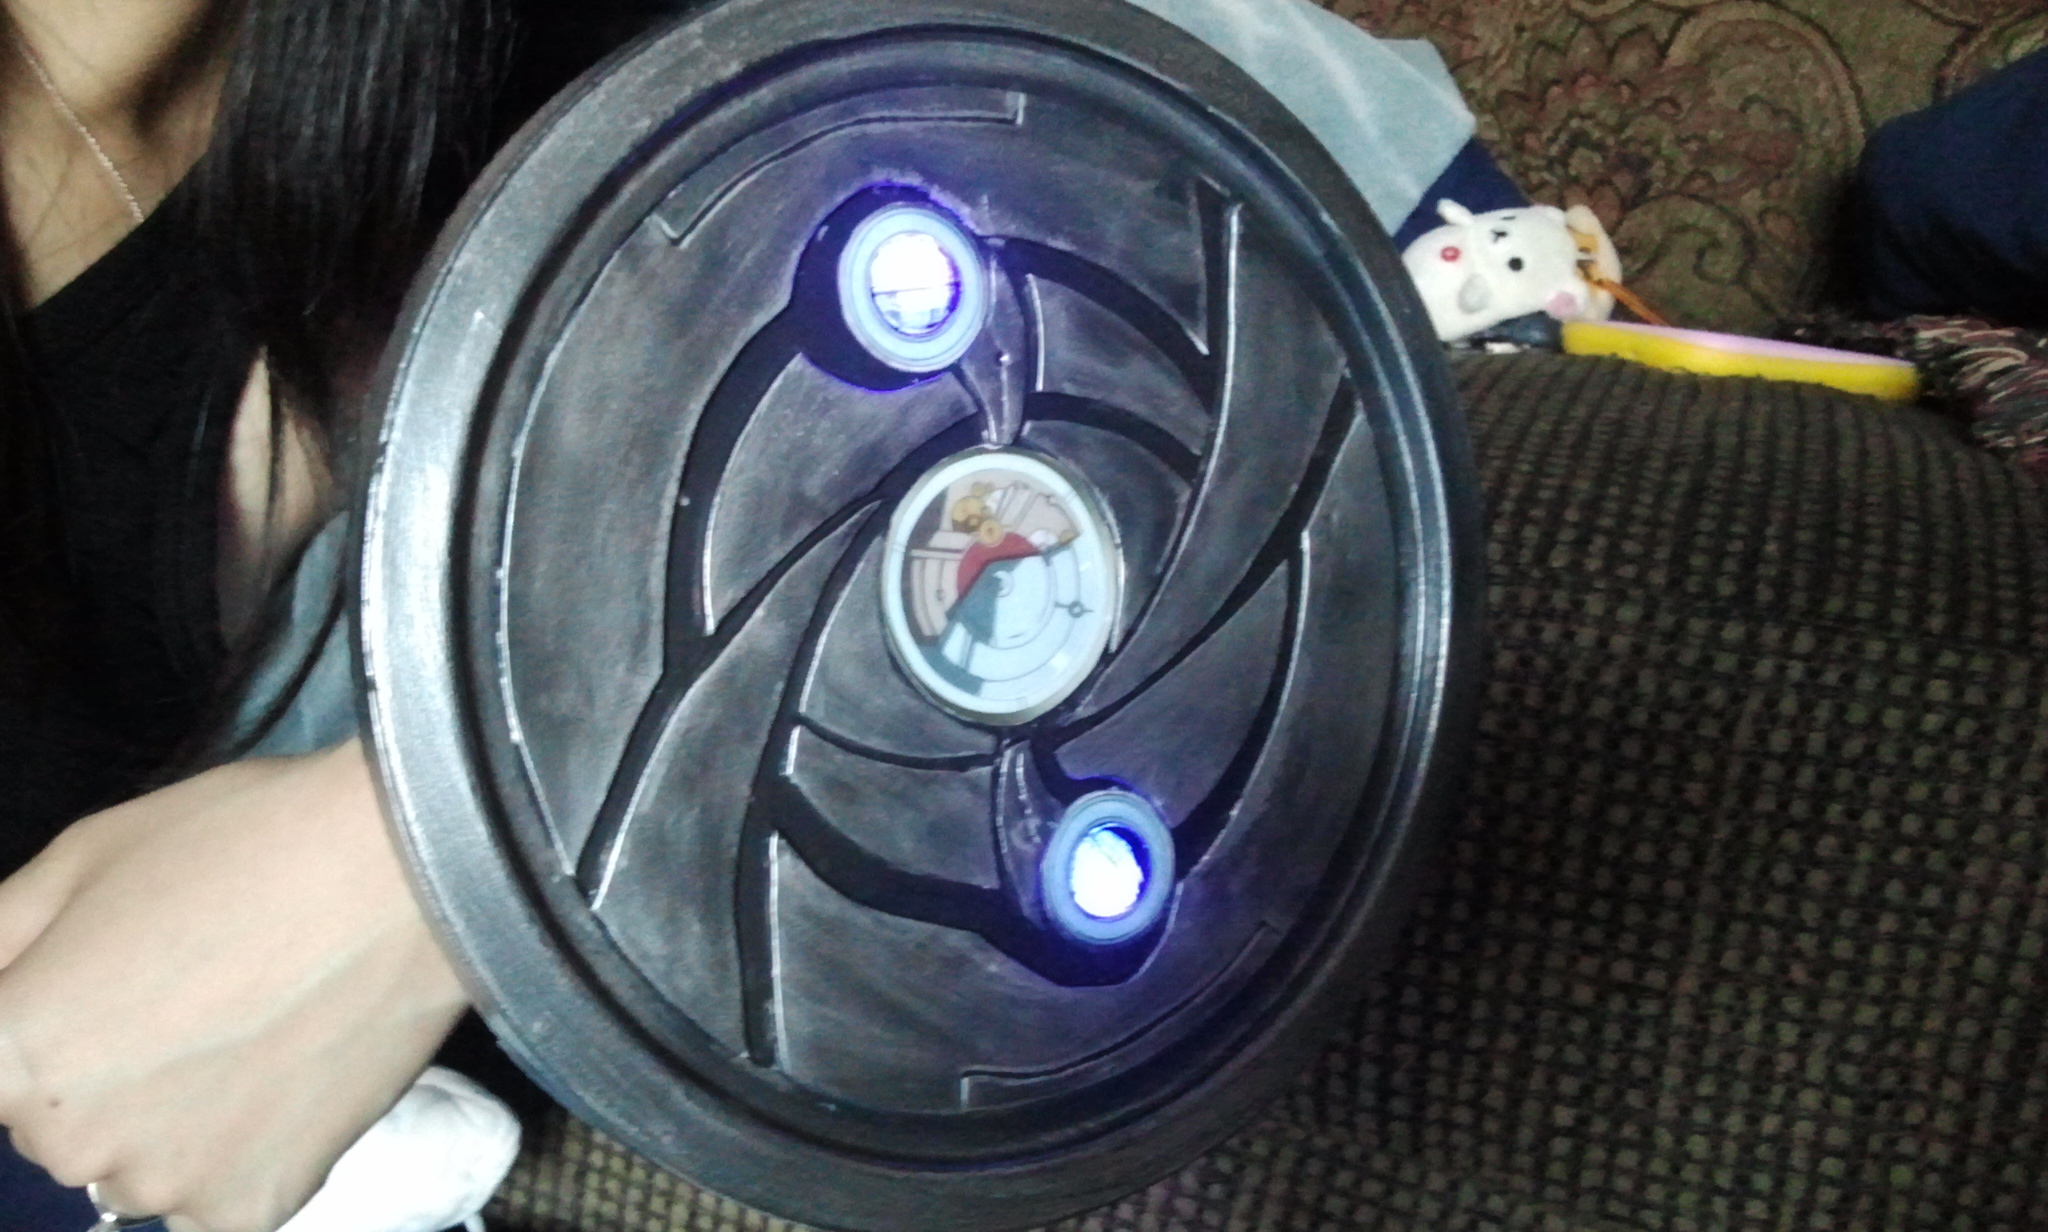
Lit time shield
Questions? Feel free to ask, and also don’t forget to check out more on my facebook page:


0 Comments