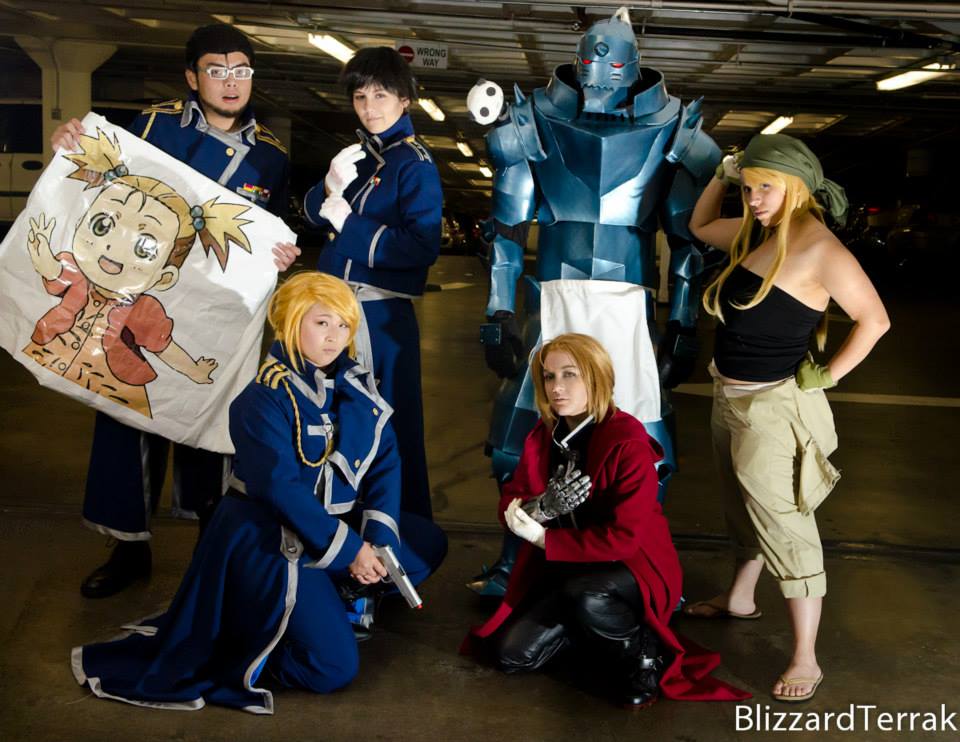
– Alphonse Elric: Otaku and Fit – Andrew’s Cosplay/Fitness/Otaku Life
– Edward Elric: Bekalou Cosplay
– Riza Hawkeye: Blue Cosplay
– Roy Mustang: Athena Marid Cosplay
– Winry Rockbell: Yukari Kaiba Cosplay
– Maes Hughes: Chase Bunnies
Photo by BlizzardTerrak Photography
I debuted my Alphonse Elric armor at Anime Los Angeles 2014 to assemble a Full Metal Alchemist group with a few of my friends. All in all, it took about 2 months to finish Alphonse taking my time. As with most of my cosplays, the armor was made out of foam with my usual method of sealing and painting which you can read about here: How to Seal and Paint Foam Armor for Cosplay
Materials (Paid links)
**For Patterning**
- Card Stock – 110 lb

- Graphtec / Silhouette SD Craft Cutter (formerly CraftROBO)
NOTE: The Silhoette SD is no longer being made. It’s replacement is the Silhouette Cameo - Printer that can accommodate 110lbs cardstock (This one has worked well for me:
HP Officejet Pro 8600 e-All-in-On Wireless Color Printer with Scanner, Copier & Fax) - Pepakura Designer
**For assembling body**
- 1/4″ foam mat
- X-Acto Knife (straight cuts)
- Xacto Board Cutter (For angled cuts)
- Hot glue gund and glue sticks
**Sealing and painting**
- Mod Podge
- Plasti Dip Rubber Coating Spray
- Automotive Adhesion promoter (Bulldog Adhesion Promoter is pricey but an excellent brand that adds some flex)
- Automotive Clear Coat Spray Cans
- Metallic Blue Spray Paint
**Electronics**
Step 1: Patterning and Assembling
1) Instead of going through the time consuming process of freehanding the entire armor (which you can read about my method here: How to Freehand Patterns for Cosplay Armor), I found a pepakura pattern off google to use as my base. I’m not sure who made it, but it was actually made to make a small “toy size” pepakura model.
2) Since this pep model was made in toy size, I increased the scale to the max which put the model at about 6’4″ in height.
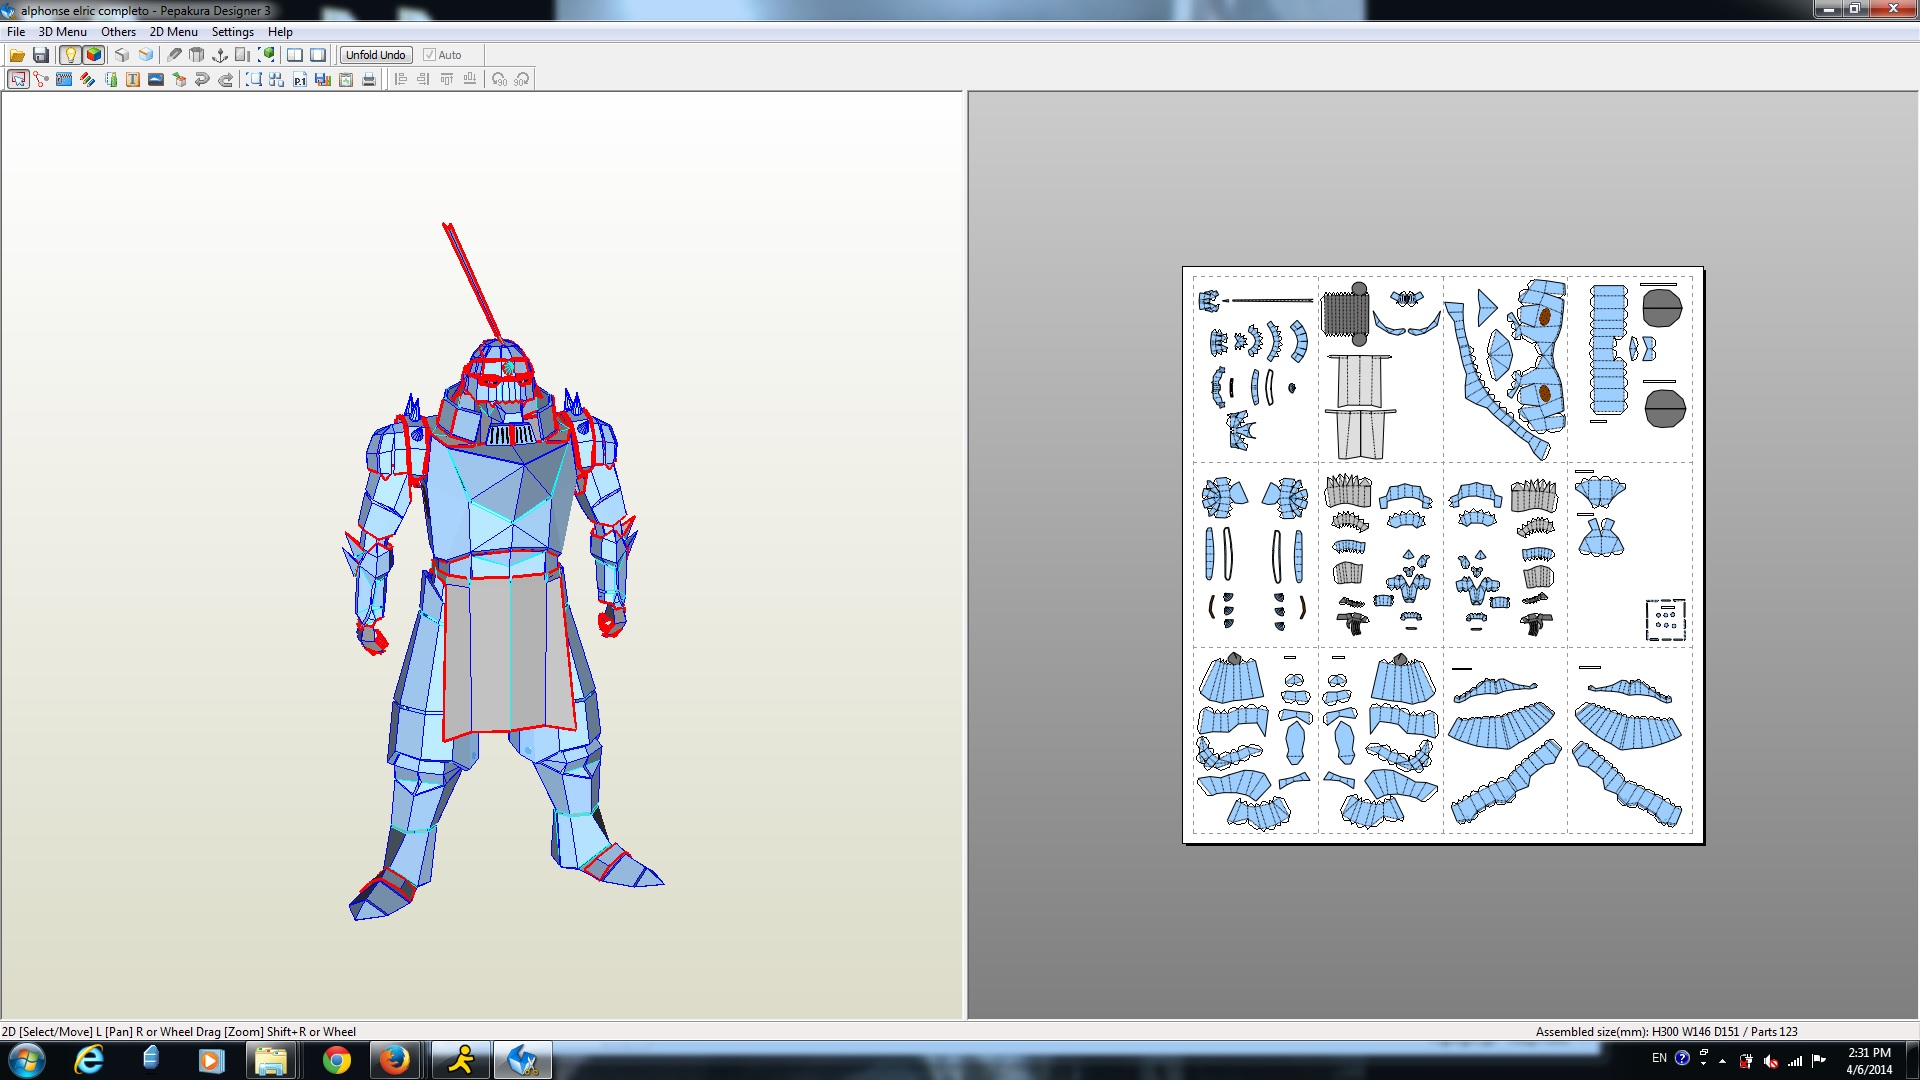
3) I printed out 1 limb at a time and cut out each of the pattens (upper arm, lower arm, shoulder, etc) since printing them out all at once would be like over 100 pages
4) If I didn’t like how the pattern looked, I modified it manually till I was happy with the result. Basically I used my freehand method to modify the existing file.
5) Once I had the patterns done, I traced them onto foam, cut with the proper angles, then hot glued everything together.


Step 2: Seal and Paint
1) I used my usual method of sealing and painting which has more details here:
How to Seal and Paint Foam Armor for Cosplay


2) I searched all over for a paint to come close to the anime reference pictures and I ended up with a metallic blue/tealish automotive paint by Duplicolor
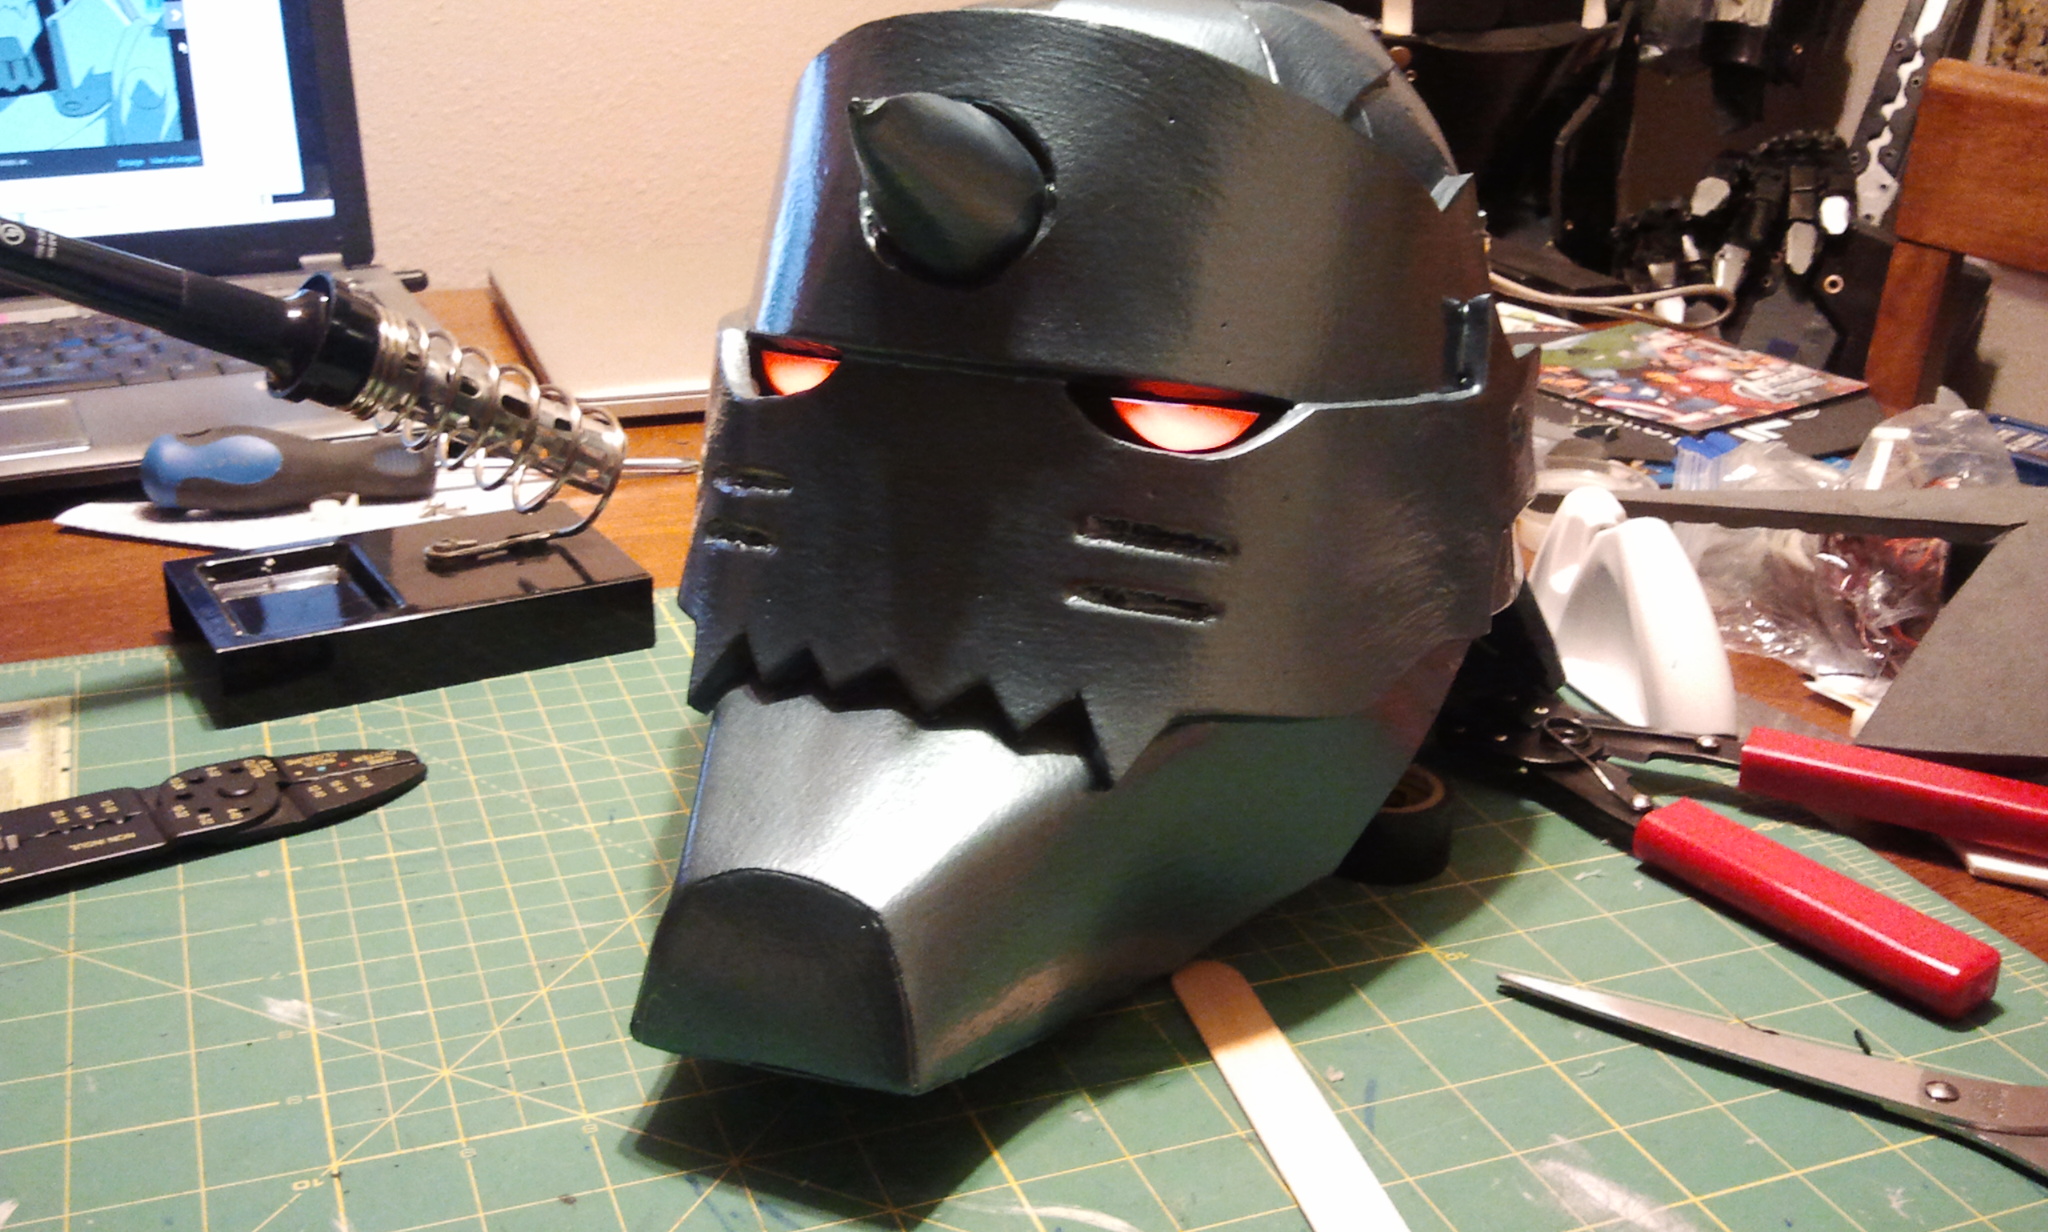
Step 3: Electronics and Voice System
1) So to give my Alphonse armor a little different edge, I wanted to be able to take off my head and have my voice come from the helmet which you can see here:
2) I attached an amp to the inside of the helmet and hooked up the wireless receiver to the amp.
3) I wore the wireless mic and put the transmitter in my pocket. Easy and good to go.
4) For the LEDs, I made eye boxes out of foam, and used red mylar folder to diffuse the light.
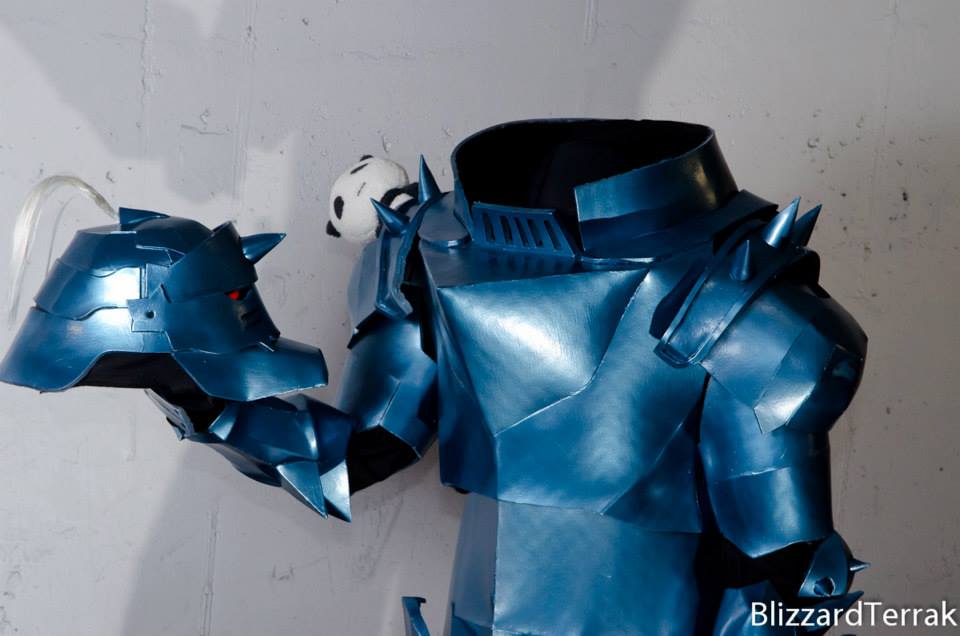
Headless Alphonse
And that’s pretty much it! You can always check out more pics on my facebook page:
Otaku and Fit – Andrew’s Cosplay/Fitness/Otaku Life


Any other questions, please let me know.


9 Comments
Jane · June 12, 2014 at 7:55 pm
Thank you so bloody much I’ve been looking for something like this for a con I’m going to
Chris · August 15, 2014 at 5:49 am
Did you only need to buy one of those Anti-Fatigue Floor Mat Rolls ?
Andrew Makes Things · August 16, 2014 at 12:49 pm
I don’t remember, sorry. I keep a bunch of foam stored and I just buy more when I’m running out.
Chris · August 18, 2014 at 2:45 am
Okay thanks, i only asked cus im not sure if one roll will be enough
Cassie · September 5, 2014 at 10:47 am
So for anyone who re created this… how did it print out? and how many rolls of foam did you use?
Austin · August 18, 2014 at 1:52 pm
Could you please post a link to the Pepikura model you used for this build? That would help out a lot. Thanks 🙂
Andrew Makes Things · August 20, 2014 at 2:18 pm
Sorry, I don’t have it. I just googled it about a year ago and I downloaded one that came up.
Anonymous · August 27, 2014 at 10:12 am
If I already asked this, I’m sorry, but it doesn’t look like my post went through…
Do you have a rough Ballpark figure of what the overall cost may have been? You said you keep supplies on hand so I understand you might not have an exact amount, but maybe a rough guess?
Andrew Makes Things · August 27, 2014 at 2:29 pm
Each costume maker’s skill level will determine how much material they use, so I cannot give you a guess. It would be baseless. For example, a skilled costume maker will probably spend less money than a novice who is still experimenting with techniques and may spend a lot of money on materials they don’t need. I spent a lot of needless money of my first project until I found the materials and techniques I was comfortable with.