


Recently, I have been working on a couple of Venom Snake Bionic Arm cosplay commissions so I thought I would share some of the work in progress pics as a well as a comparison with the prosthetics I have previously made. I’ll also cut and paste the procedures I used from my How to Cosplay Venom Snake (Metal Gear Solid V: The Phantom Pain) Tutorial.
Materials (Paid links)
- 1/4 inch anti-fatigue foam roll

- 3mm Foam
- Black Glove
- Dupli-Color Dark Cherry Metallic Spray Paint
- Filler Primer Spray Can
- Dupli-Color Sunburst Gold Metallic
- Dupli-Color Universal Gloss Black
- Bulldog Adhesion Promoter
- Automotive Clear Coat Spray
Construction Steps
1) The first thing I did for both methods was to pattern the arm. I talk about how I freehand my patterns in this previous post:
How to Freehand Patterns for Cosplay Armor
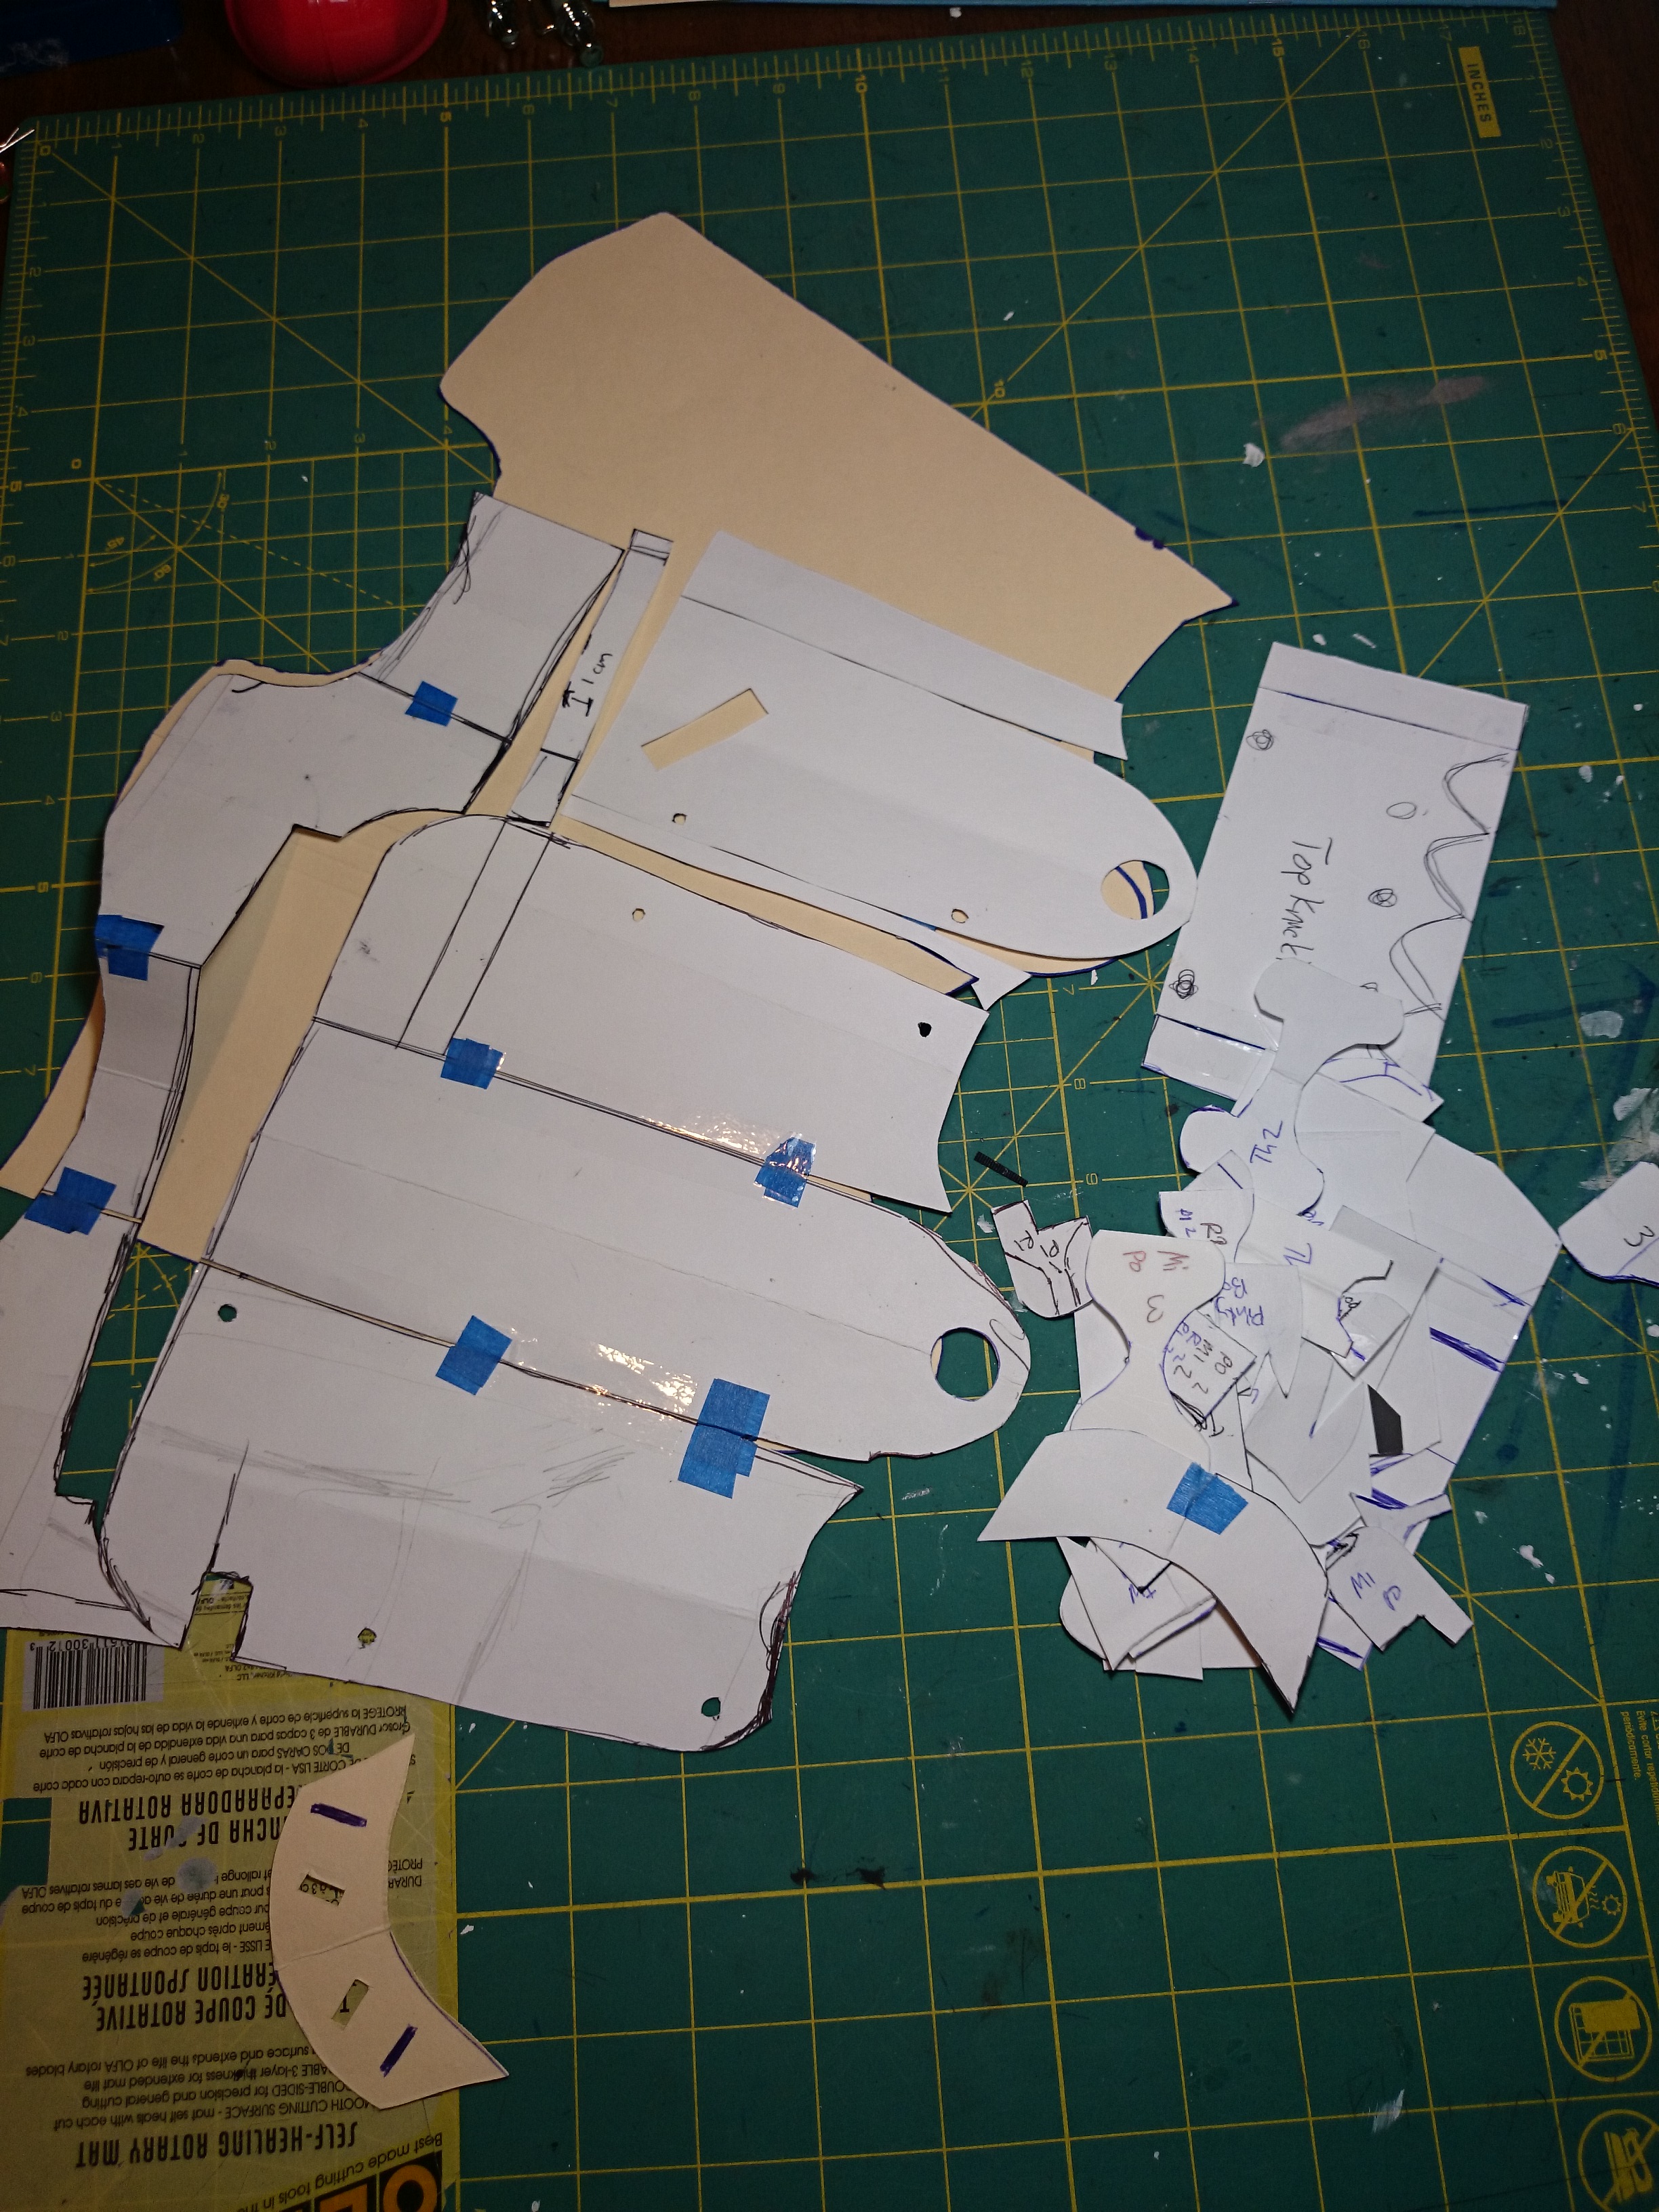
Take your time patterning
Sizes were modified depending on the each client’s measurements.
2) I cut out the pattern of the base piece with 1/4″ foam for a bit more of a rigid structure. I then cut out the detail pieces out of thinner 3mm foam and hot glued those on top of the base piece.


3) I used a glove as my base for the hand, and then made the structure out of 3mm foam.


3) Once assembled, I used my sealing and painting method the I write about here in order to finish the piece off:
How to Seal and Paint Foam Armor for Cosplay


v1 Foam Arms (left) vs New v2 Foam Arms (right)


I’m very happy with the result of the newer arms. Much better than the rush job I did with the original I used for my own foam arm. Shows what experience and patience do to the quality of your work! For putting together the rest of the cosplay, check out my How to Cosplay Venom Snake (Metal Gear Solid V: The Phantom Pain) Tutorial. Feel free to comment below with any questions, and if you’re interested in a commission, feel free to send me a message on my Facebook Page.


2 Comments
How to Cosplay Venom Snake (Metal Gear Solid V: The Phantom Pain) Tutorial - Otaku and Fit · January 29, 2015 at 8:18 pm
[…] *Update 1/29/2015* Separate tutorial for creating the foam arm here: Venom Snake Cosplay Arm Commission/Tutorial Photos (Metal Gear Solid V) […]
Venom Snake Makeup and Cosplay Tutorial - Metal Gear · November 7, 2015 at 4:35 pm
[…] I frequently get questions on how to attached the horn when cosplaying Venom Snake and how to tie the scarf. I made the above video to help explain how I personally do it. And if you’re still looking how to put together your own Venom Snake cosplay, check out these post here: How to Cosplay Venom Snake (Metal Gear Solid V: The Phantom Pain) and How to make a Venom Snake Bionic Arm […]