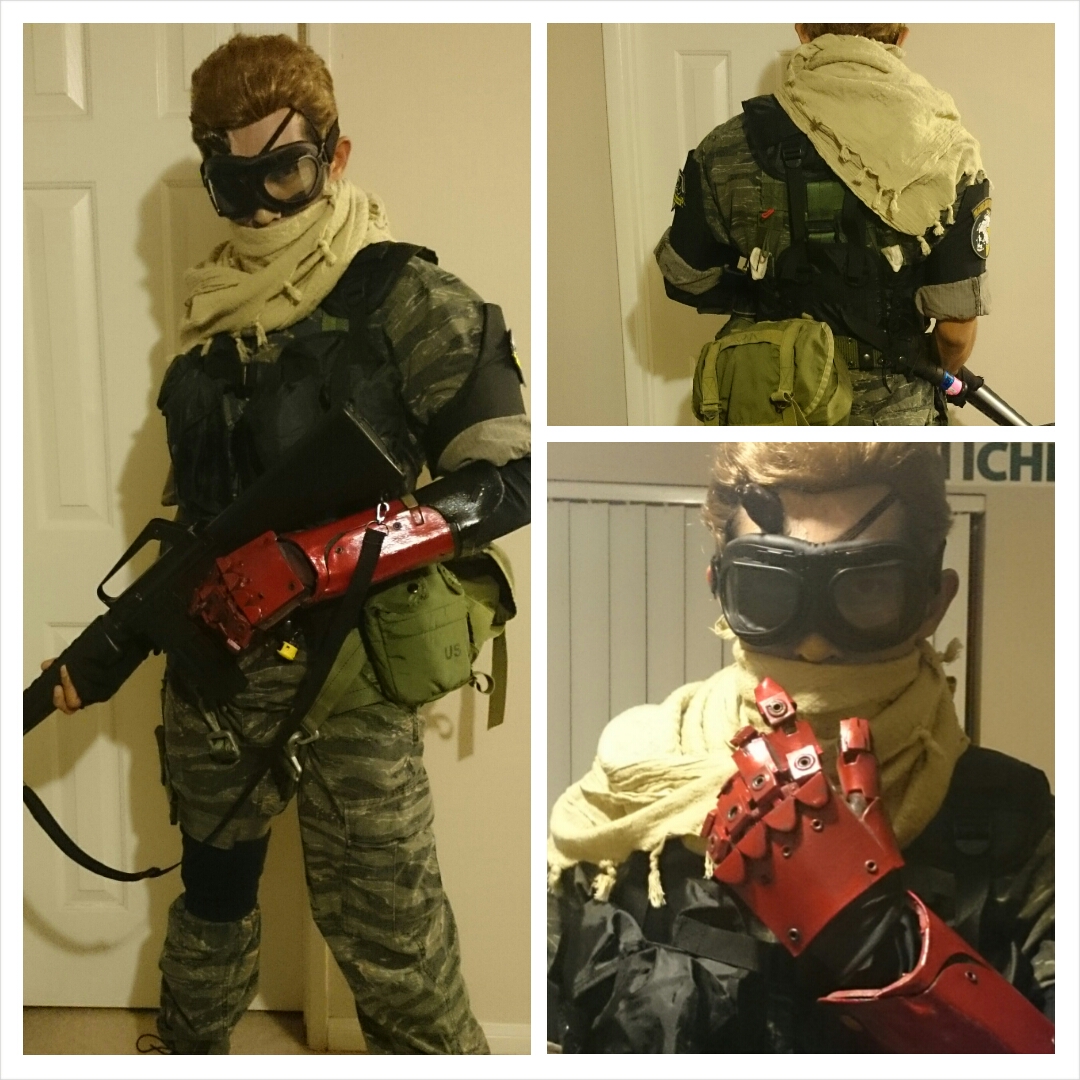
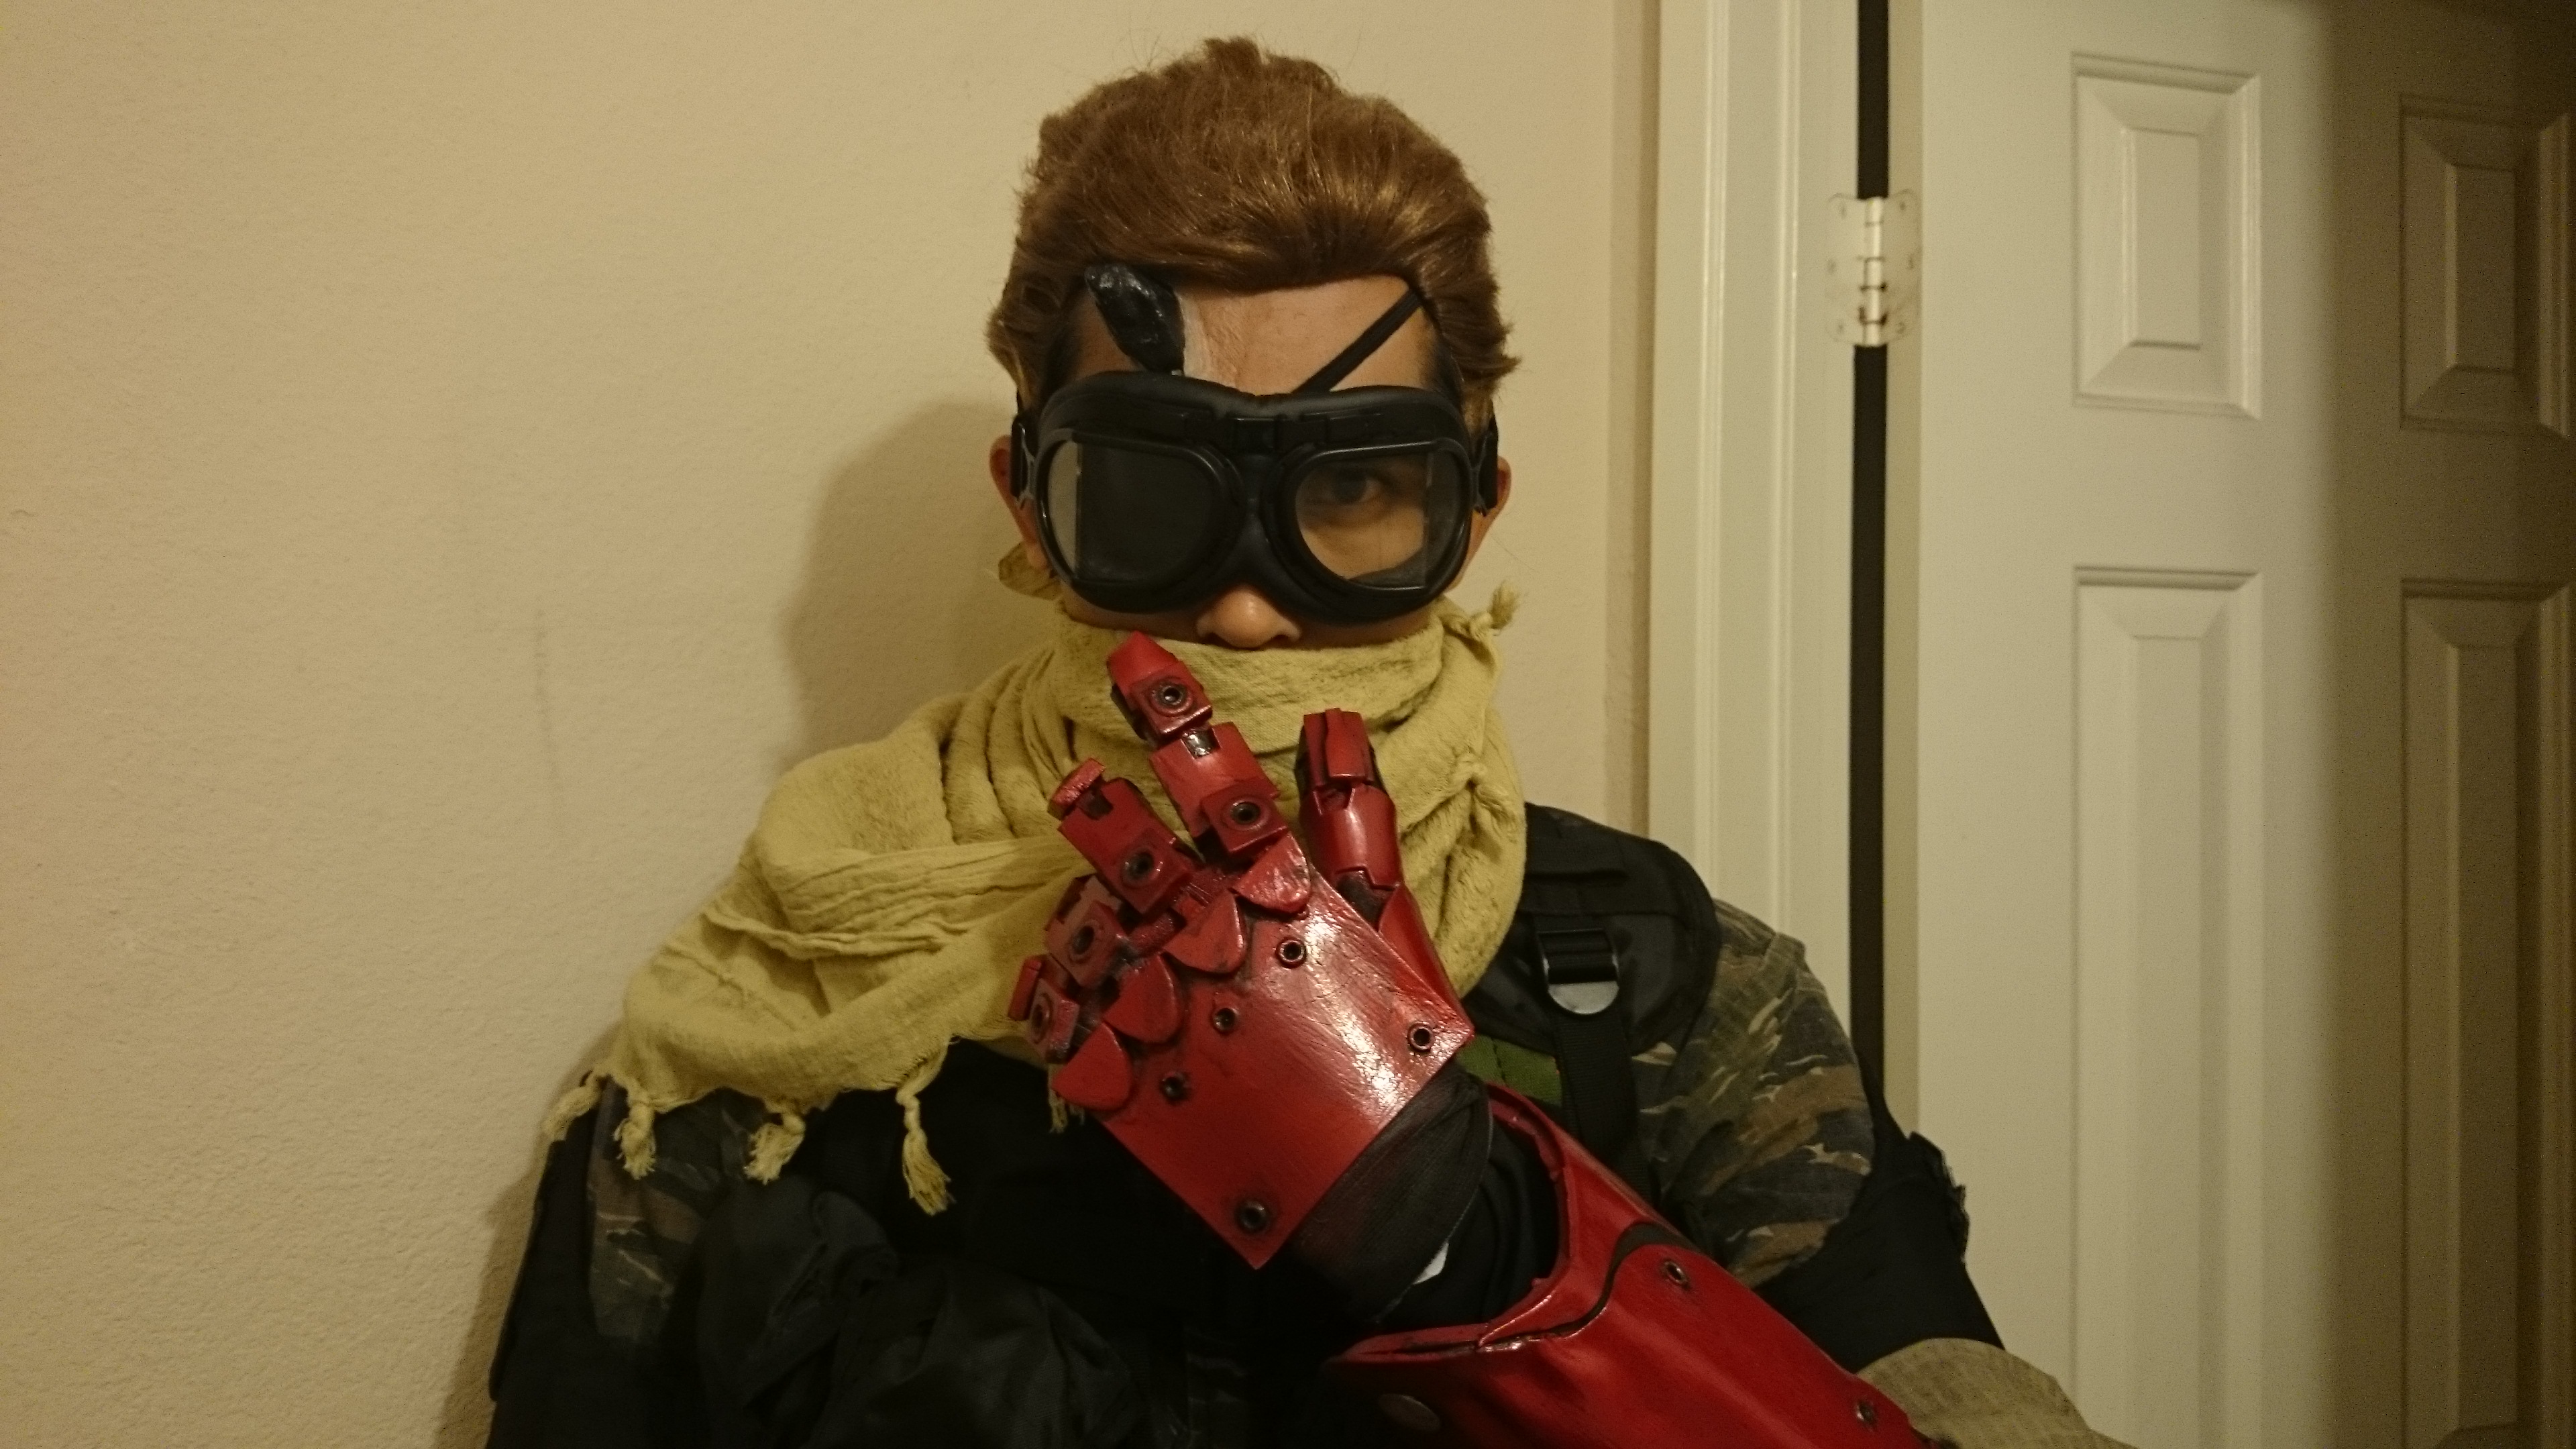
When San Diego Comic Con was coming up and I didn’t have any new cosplays to wear, I was motivated by seeing the 2014 E3 Metal Gear Solid V: The Phantom Pain trailer to quickly make a Venom Snake/Punished Snake cosplay. Those who know me and follow my facebook page know that I love Metal Gear and anything Hideo Kojima. I much of the equipment from my other Metal Gear Peace Walker soldier cosplay, so all I had to do was buy a few things, modify a few pieces, and make the prosthetic forearm.
I’ll assume that readers have none of the gear to make the costume, so I will put links to all parts of the cosplay that can be purchased, similar to a popular tutorial that has been around for a while for MGS3 Big Boss. I will also talk about the pieces I modified, and the 2 different methods I used to create the prosthetic forearm.
Venom Snake Cosplay Uniform and Gear
Most of Snake’s uniform can be found from military surplus stores and amazon. Links here for buyer’s reference. (Paid links)
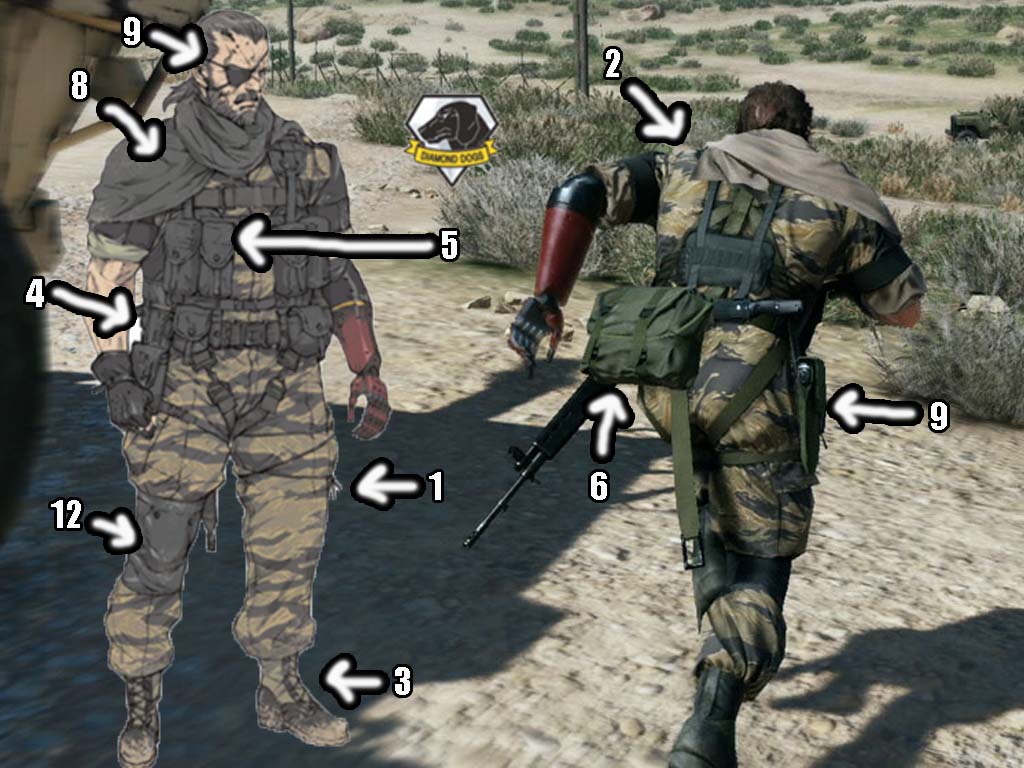
- Vietnam Era Tiger Stripe Pants
- Vietnam Era Tiger Stripe Fatigue Top
- Vietnam Jungle Boot
- Miltary Equipment Belt
- Black Tactical Assault Vest
- Olive Drab Canvas Butt Pack
- Military Canteen (Not Pictured, but appears on Snake’s Left Hip)
- Shemagh Tactical Scarf (Tan)
- Pistol Holster (Olive Drab)
- Goggles
(Not Pictured)
- Eye Patch
- Black Knee Sleeve
Weapons
- Rubber Knife
- Silenced Airsoft Pistol
(Not the exact model Snake uses, but has the same visual effect)
- Airsoft Assault Rifles
(Couldn’t find the exact model used in Ground Zeroes, so just choose one that you like)
Modified Pieces
The remaining piece of the costume were bought and then modified to fit the reference photos as close as possible
Undershirt/Sleeve

Under Sleeve
I modified a Black Compression Shirt by cutting off the right side since Venom Snakes no longer has sleeves. I kept the left side in tact and cut a hole on the thumb section which I put my hand through to keep the sleeve tight. The black sleeve simulated empty space when I put the forearm prosthetic on
Brassards/Patches
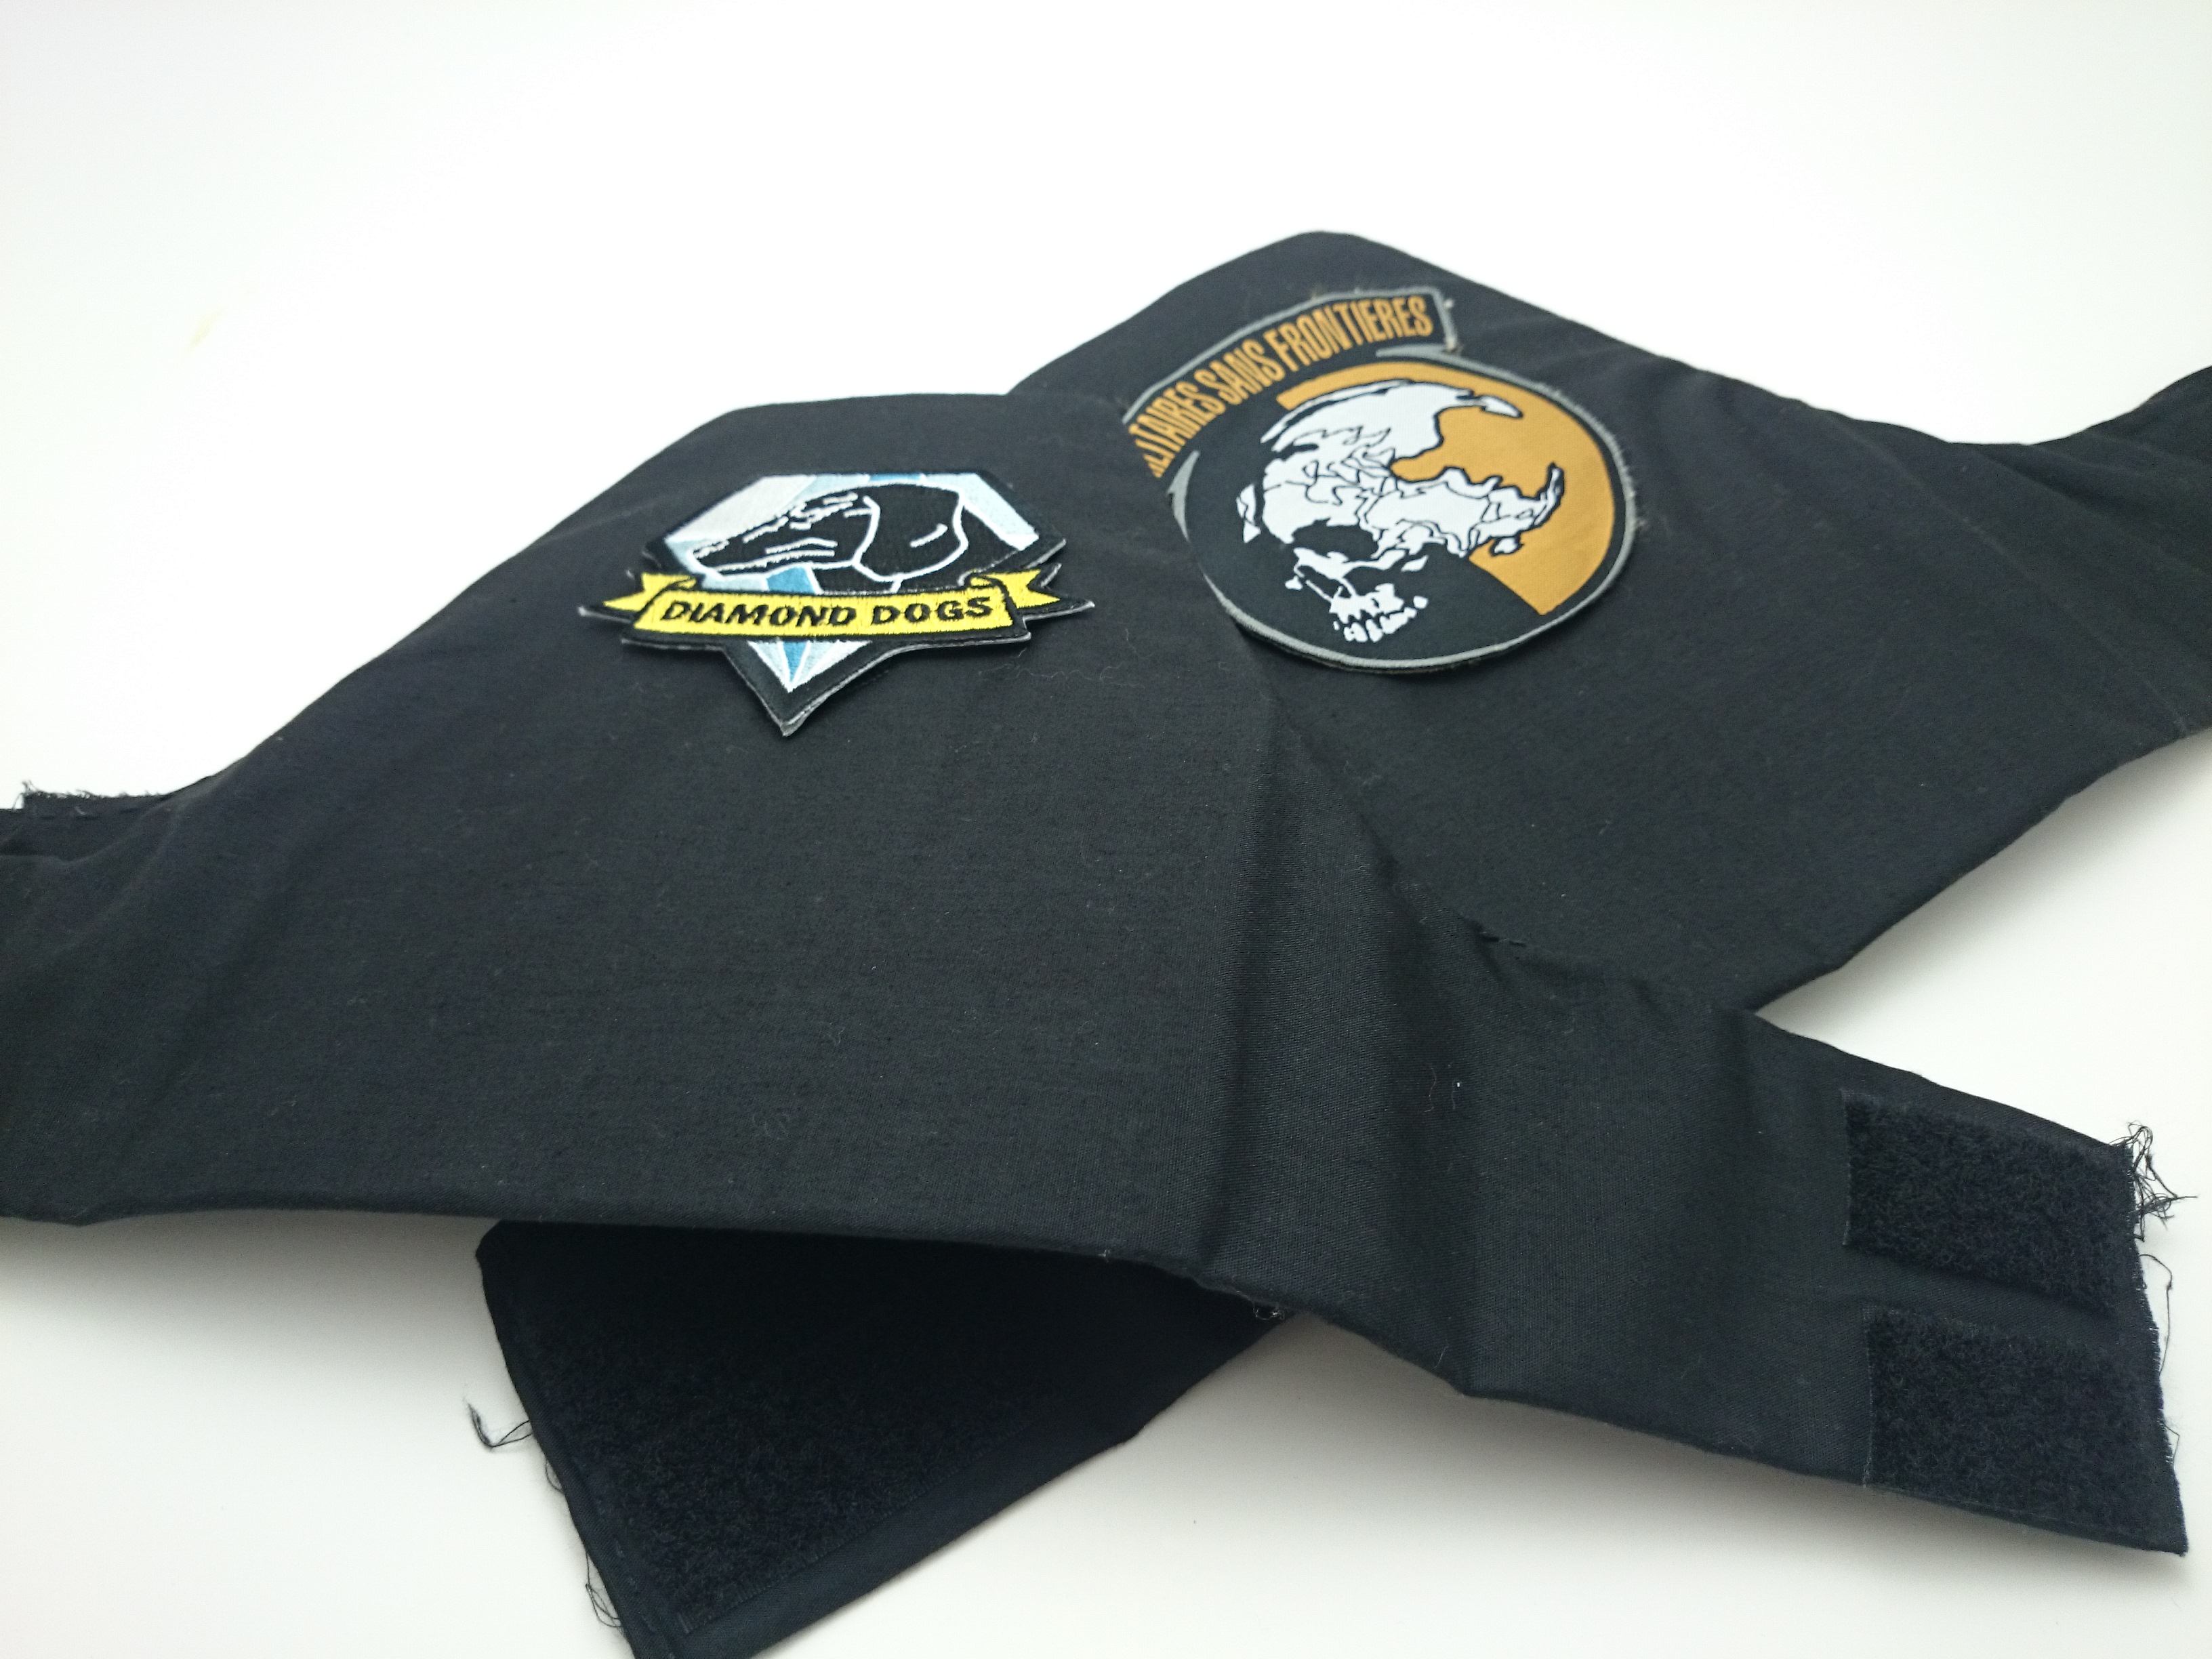
Brassards
I previously made these brassards for my Peace Walker Soldier. It was a simple piece to make by patterning out with cardboard, and then I hand sewed some cheap black fabric over the cardboard. Not the most graceful, but it worked. I bought a Diamond Dogs Patch that velcro’d to the brassard. The Militares San Frontiers patch was left over from my Peace Walker cosplay, and I’ve seen some screenshots with Venome Snake still wearing this patch on his arm.
Gloves
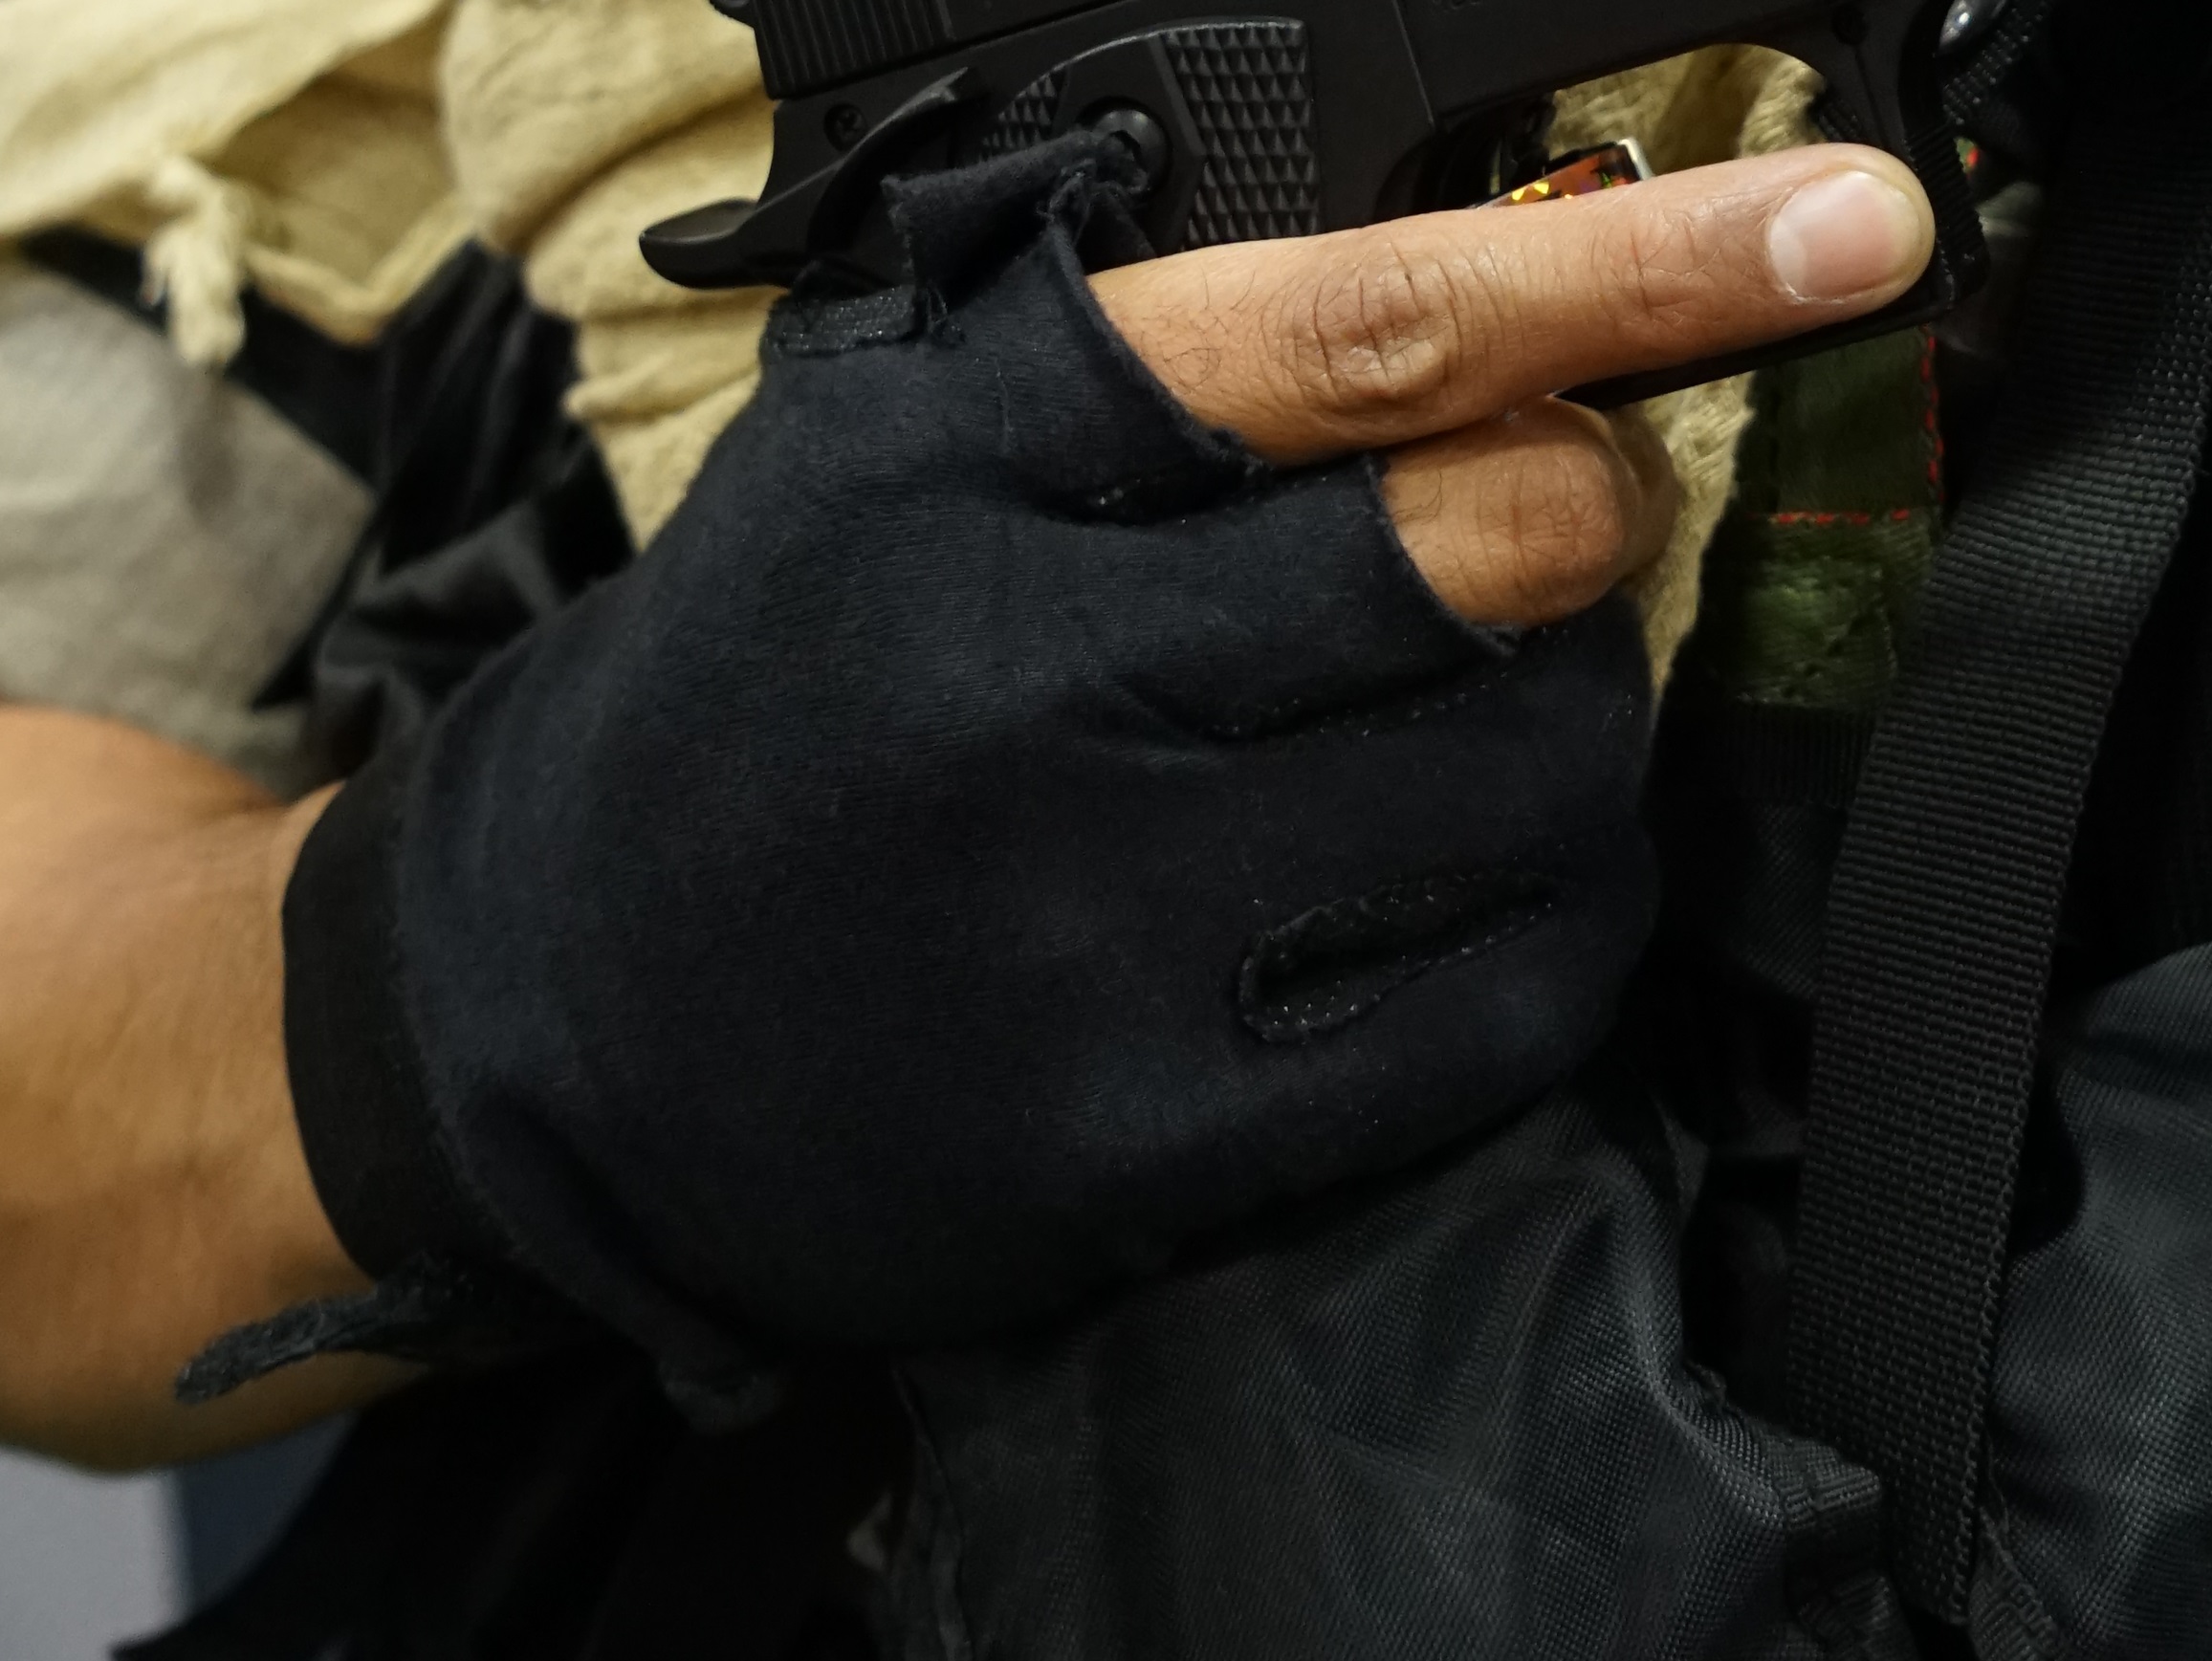
Modified Glove
I bought something similar to these Black Tactical Gloves and cut the thumb, index, and middle fingers half way. Easy.
SPIE Harness (Parachute Harness)
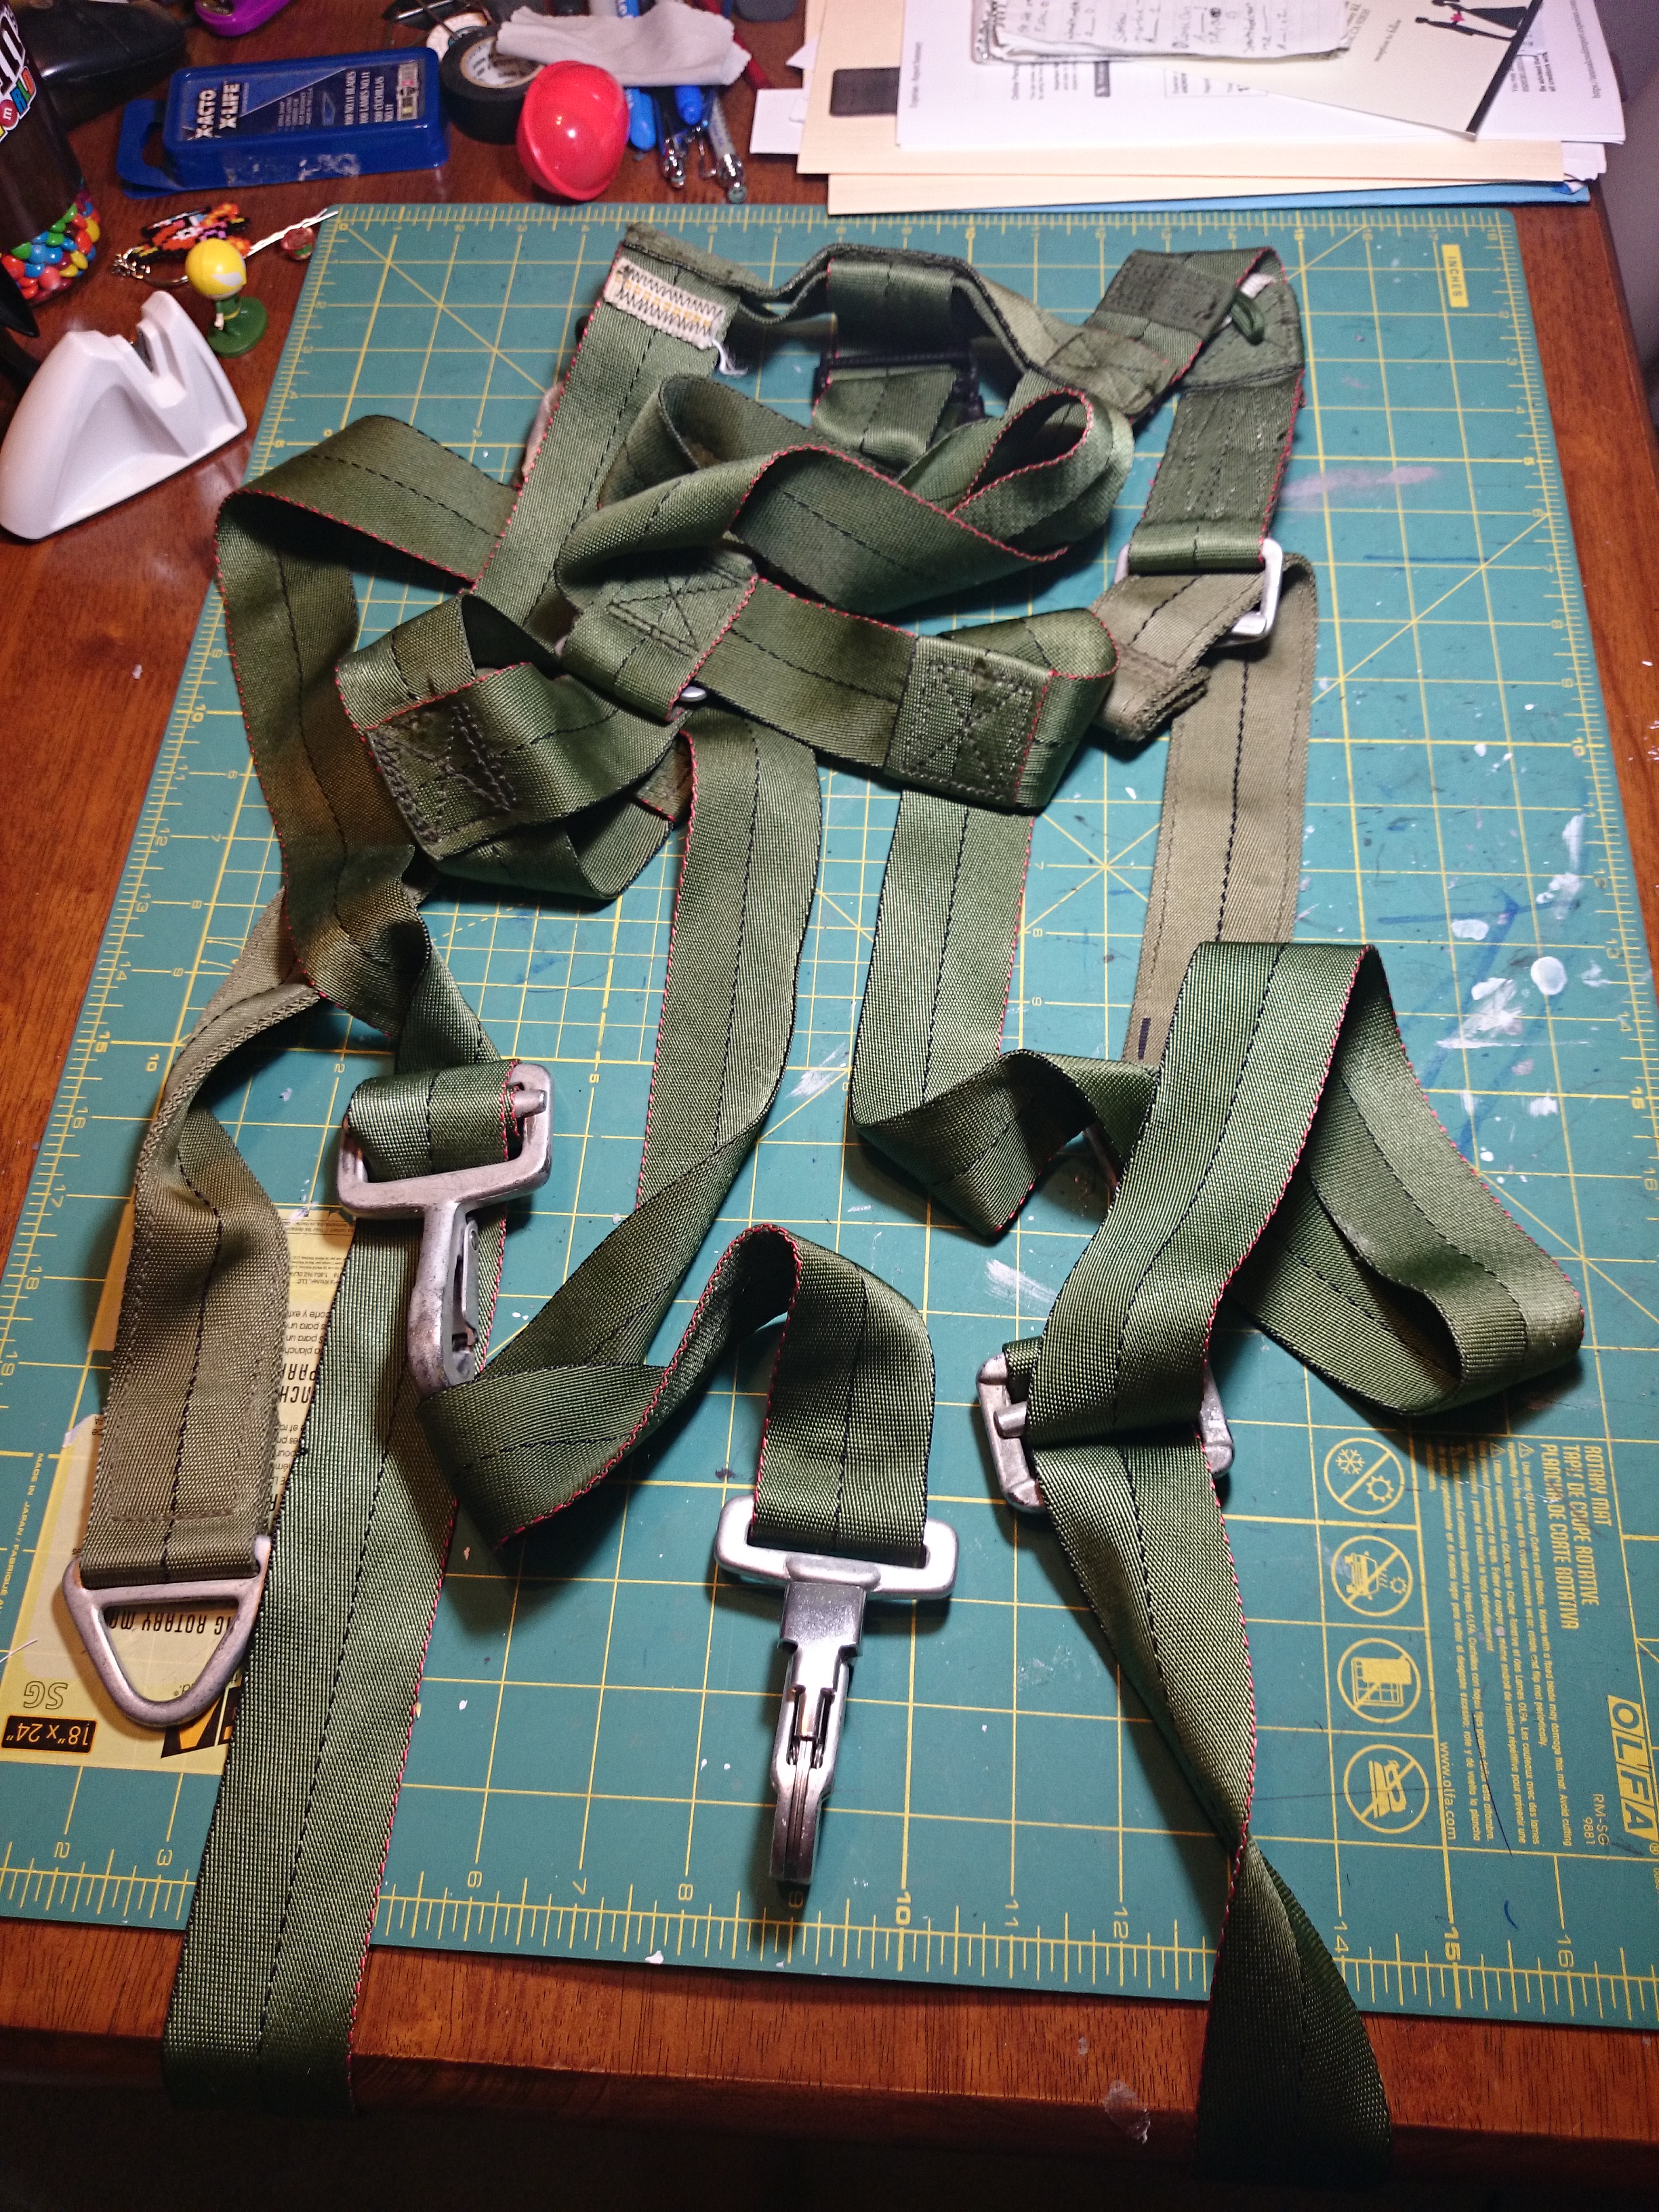
Parachute Harness
This is one of the most expensive pieces to buy so like many other Snake cosplayers before me, I searched ebay for use military parachute harnesses. I got one for about $30 that had most of the buckles needed, and I used one of the straps to attach to my back to have the hanging “tail” that snake has. Not 100% accurate but it gets the job done. This type of harness was worn slightly different than the MGS3 version. The front strap was made longer so it would wrap behind me and under and up my inner thigh. The back strap looped to the front and attached.
Wig Options
I’m not too savvy with wigs, but there were two that I have that work okay I guess. I’m still looking for a better one for the future.
Basically I cut and thinned out the wigs till I thought it looked close enough to Snake’s hair. My first try at styling a wig, so it came out kinda eh. I’ll get better with more practice though.
Venom Snake Prosthetic Forearm
*Update 1/29/2015* Separate tutorial for creating the foam arm here: Venom Snake Cosplay Arm Commission/Tutorial Photos (Metal Gear Solid V)
The forearm/hand was the longest part of assembling the cosplay. The first arm/glove I made was all made out of foam. I have recently remade the arm/glove using Worbla (a thermo plastic) because my original arm got really beat up during San Diego Comic Con. I took my time with the second arm, and I felt I made a better product.
Materials
- 1/4 inch anti-fatigue foam roll
(Method 1 only)
- 3mm Foam
- Dupli-Color Dark Cherry Metallic Spray Paint
- Brass Eyelets
(Method 1 only)
- Filler Primer Spray Can
- Dupli-Color Sunburst Gold Metallic
- Dupli-Color Universal Gloss Black
- Bulldog Adhesion Promoter
- Automotive Clear Coat Spray
- Worbla Sheets (Method 2 only)
- Rage Gold Premium Lightweight Body Filler
(Method 2 only)
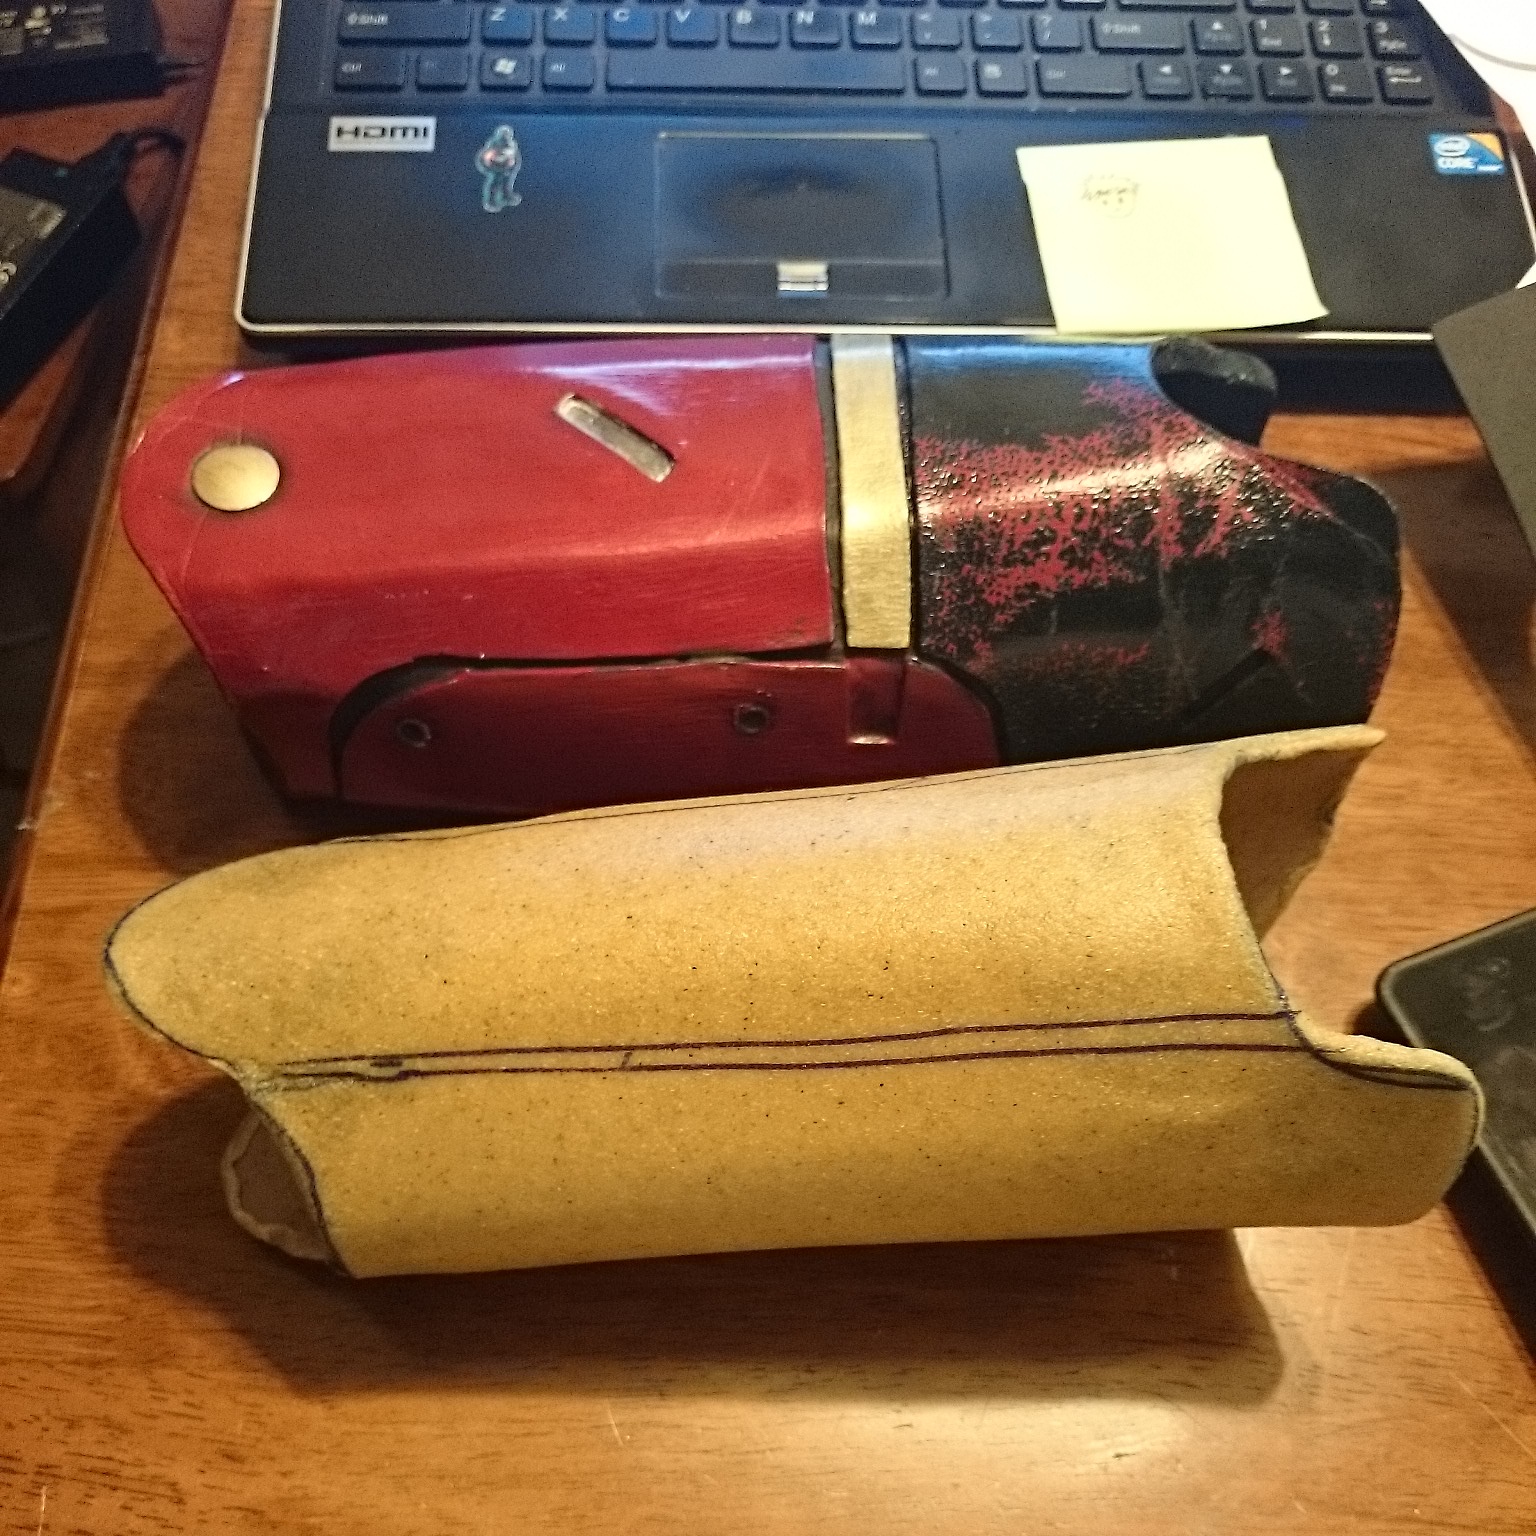
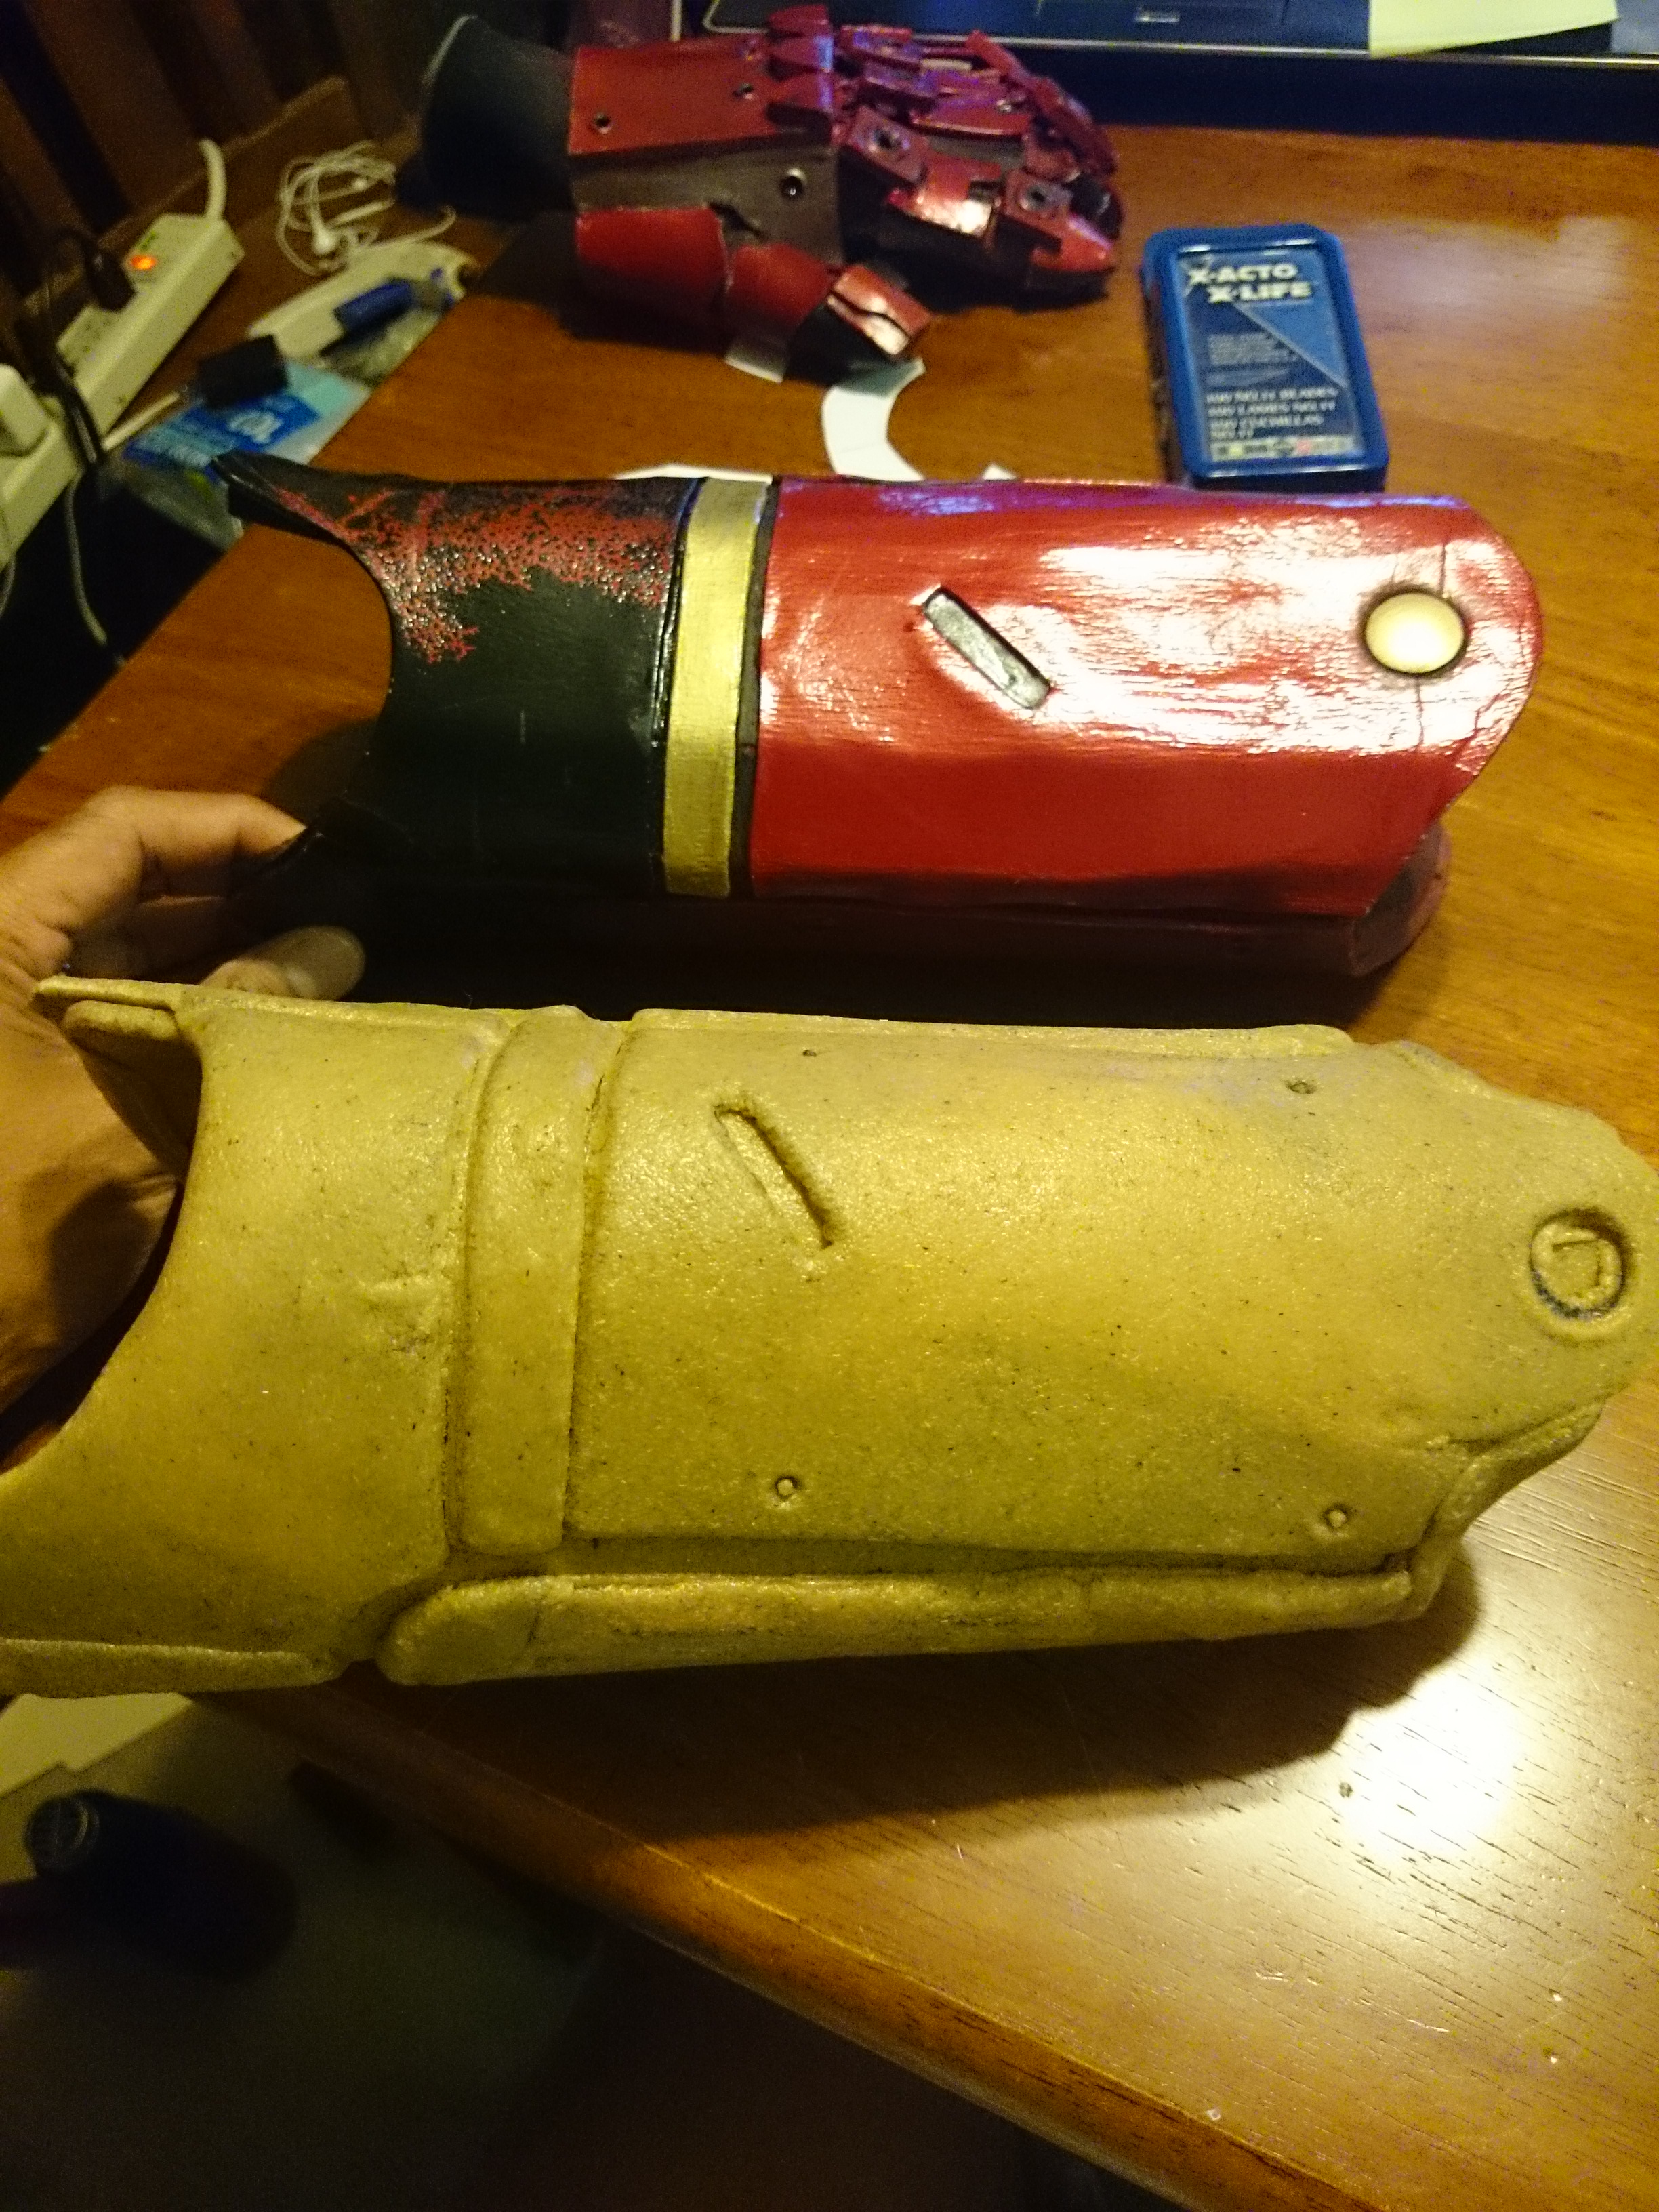
The first thing I did for both methods was to pattern the arm. I talk about how I freehand my patterns in this previous post:
How to Freehand Patterns for Cosplay Armor


It is important to realize patterning is the most important step. The more work you put upfront to making a accurate patterns, the better the final product will be. The first arm I made was a rush job. It got the job done, but I am much happier with how my 2nd attempt turned out. I spent more time patterning the second time around and I feel that it really shows a difference.
Method 1: Foam Arm/Hand (quick method)
1) I cut out the pattern of the base piece with 1/4″ foam for a bit more of a rigid structure. I then cut out the detail pieces out of thinner 3mm foam and hot glued those on top of the base piece. I then drilled holes through the piece big enough to stick eyelets in the holes to simulate the screw details.
2) I used a glove as my base for the hand, and then made the structure out of 1/4 and 3mm foam, and used eyelets for the details just like the forearm piece.
Complete Foam Arm and Glove
3) Once assembled, I used my sealing and painting method the I write about here in order to finish the piece off:
How to Seal and Paint Foam Armor for Cosplay
1st try, made out of foam
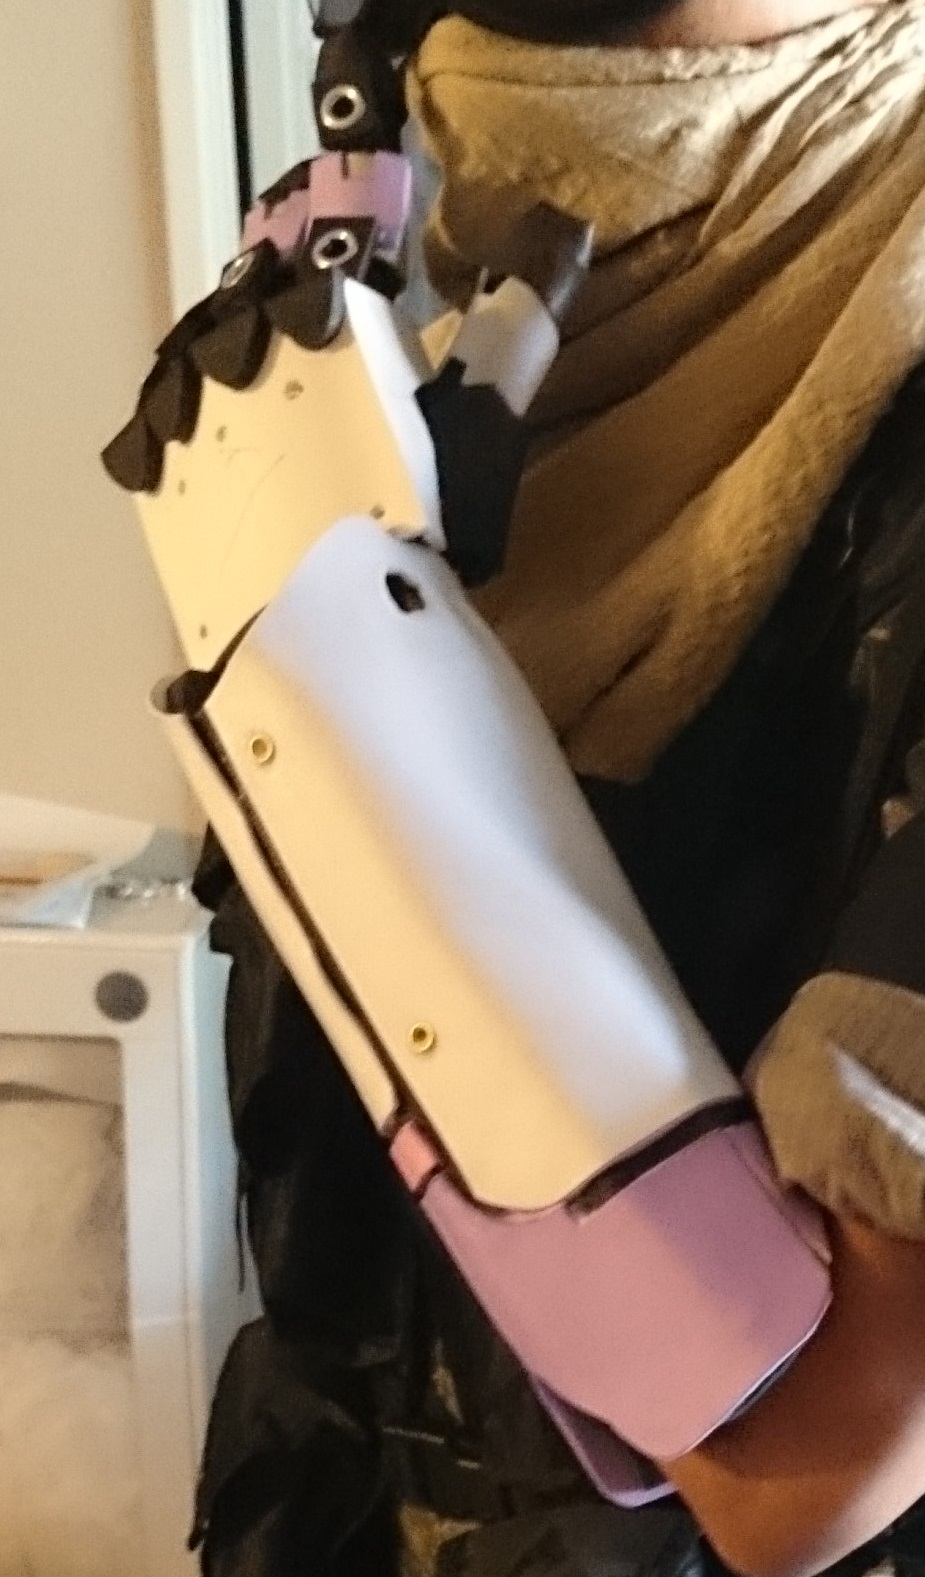
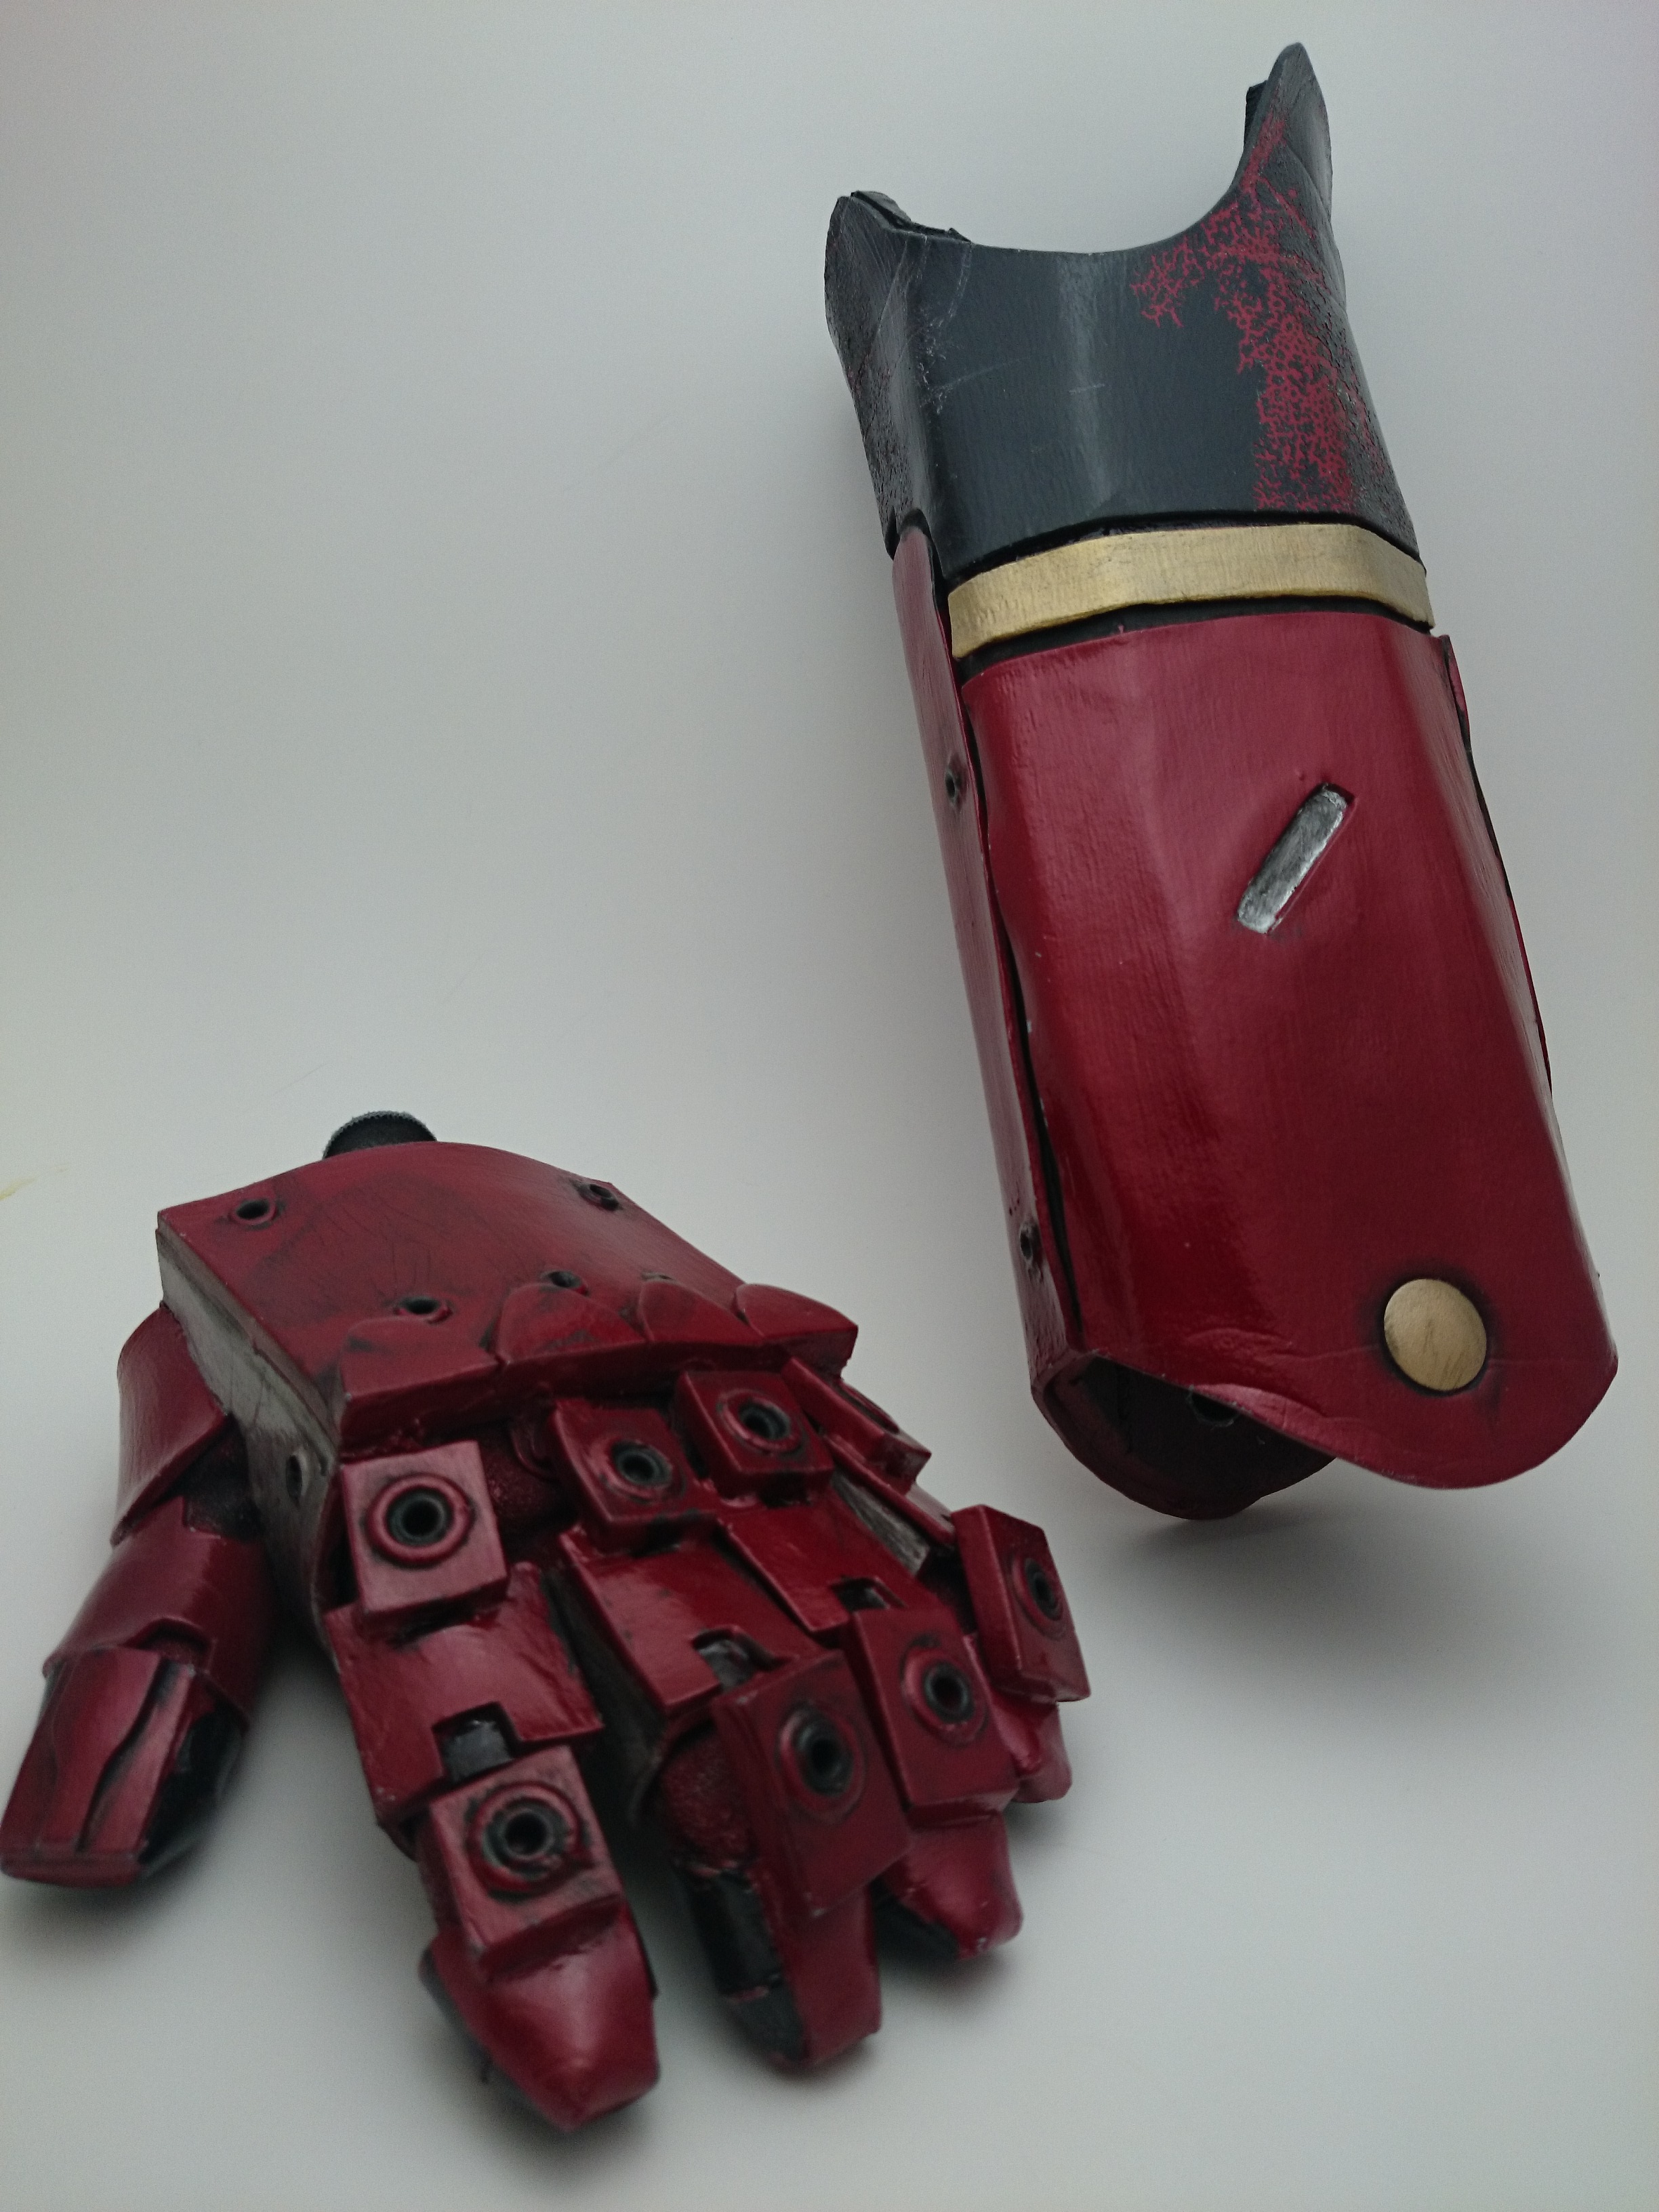
Method 2: Worbla Arm/Hand (longer method)
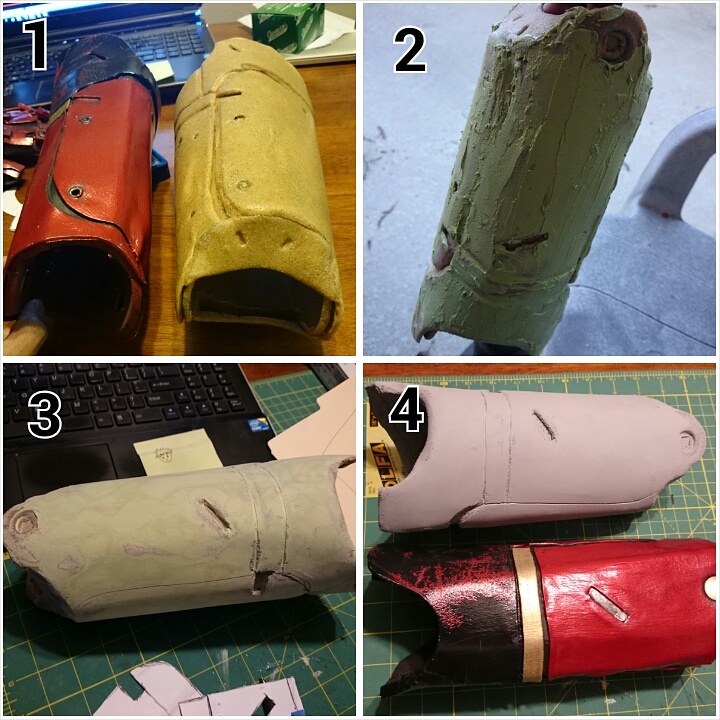
1) I cut out all patterns from 3mm foam, then proceeded to use the sandwich method (google it for good youtube tutorials) with the Worbla over the foam. I then curved the piece over a thick pvc pipe and heat gun till I bonded the edges in a circular fashion and got the correct shape. In hindsight, I maybe should have pasted all the 3mm details over the foam before using any Worbla. Also, I probably could have saved on material by using the fold over edge method instead of the sandwich method.
2) I cut out all detail pieces out of 3mm foam as well, used the sandwich method, and heat gun bonded them onto the base piece. I also used the back of a pen while the Worbla was heated to simulate those little screw detail holes (which ended up being a waste of time later on cause they got covered in the body filler stage)
3) The piece ended up very wrinkly and Worbla already has a craptacular texture, so I decided to do a lot of body filler and sanding on the piece to fill gaps and smooth it out. You can google techniques on how people use this stuff for automotive purposes for more information. This was the most painstaking part and took a good week of sanding to get things smooth enough to my liking. The basis of the process is to fill gaps with body filler, sand with 60 grit and repeat till all wrinkles are gone. Then you sand with 120 grit, then 220 grit to smooth out the piece of scratches.
4) For the hand, I used both Worbla and foam. Foam for the flexible areas for more mobility, and then Worbla on the rigid sections. Since these pieces were smaller, it was harder to use body filler so instead I started by covering coating each piece with 3 layers of Gesso and then filled in gaps with Bondo Glazing and Spot Putty
. I sanded everything with 220 grit sandpaper, and reapplied spot putty where it was needed and re-sanded till I was happy.


5) After all the pieces were smooth enough, I hit everything with 2-3 coats of automotive filler primer, then finished off painting and clear coating. Done!
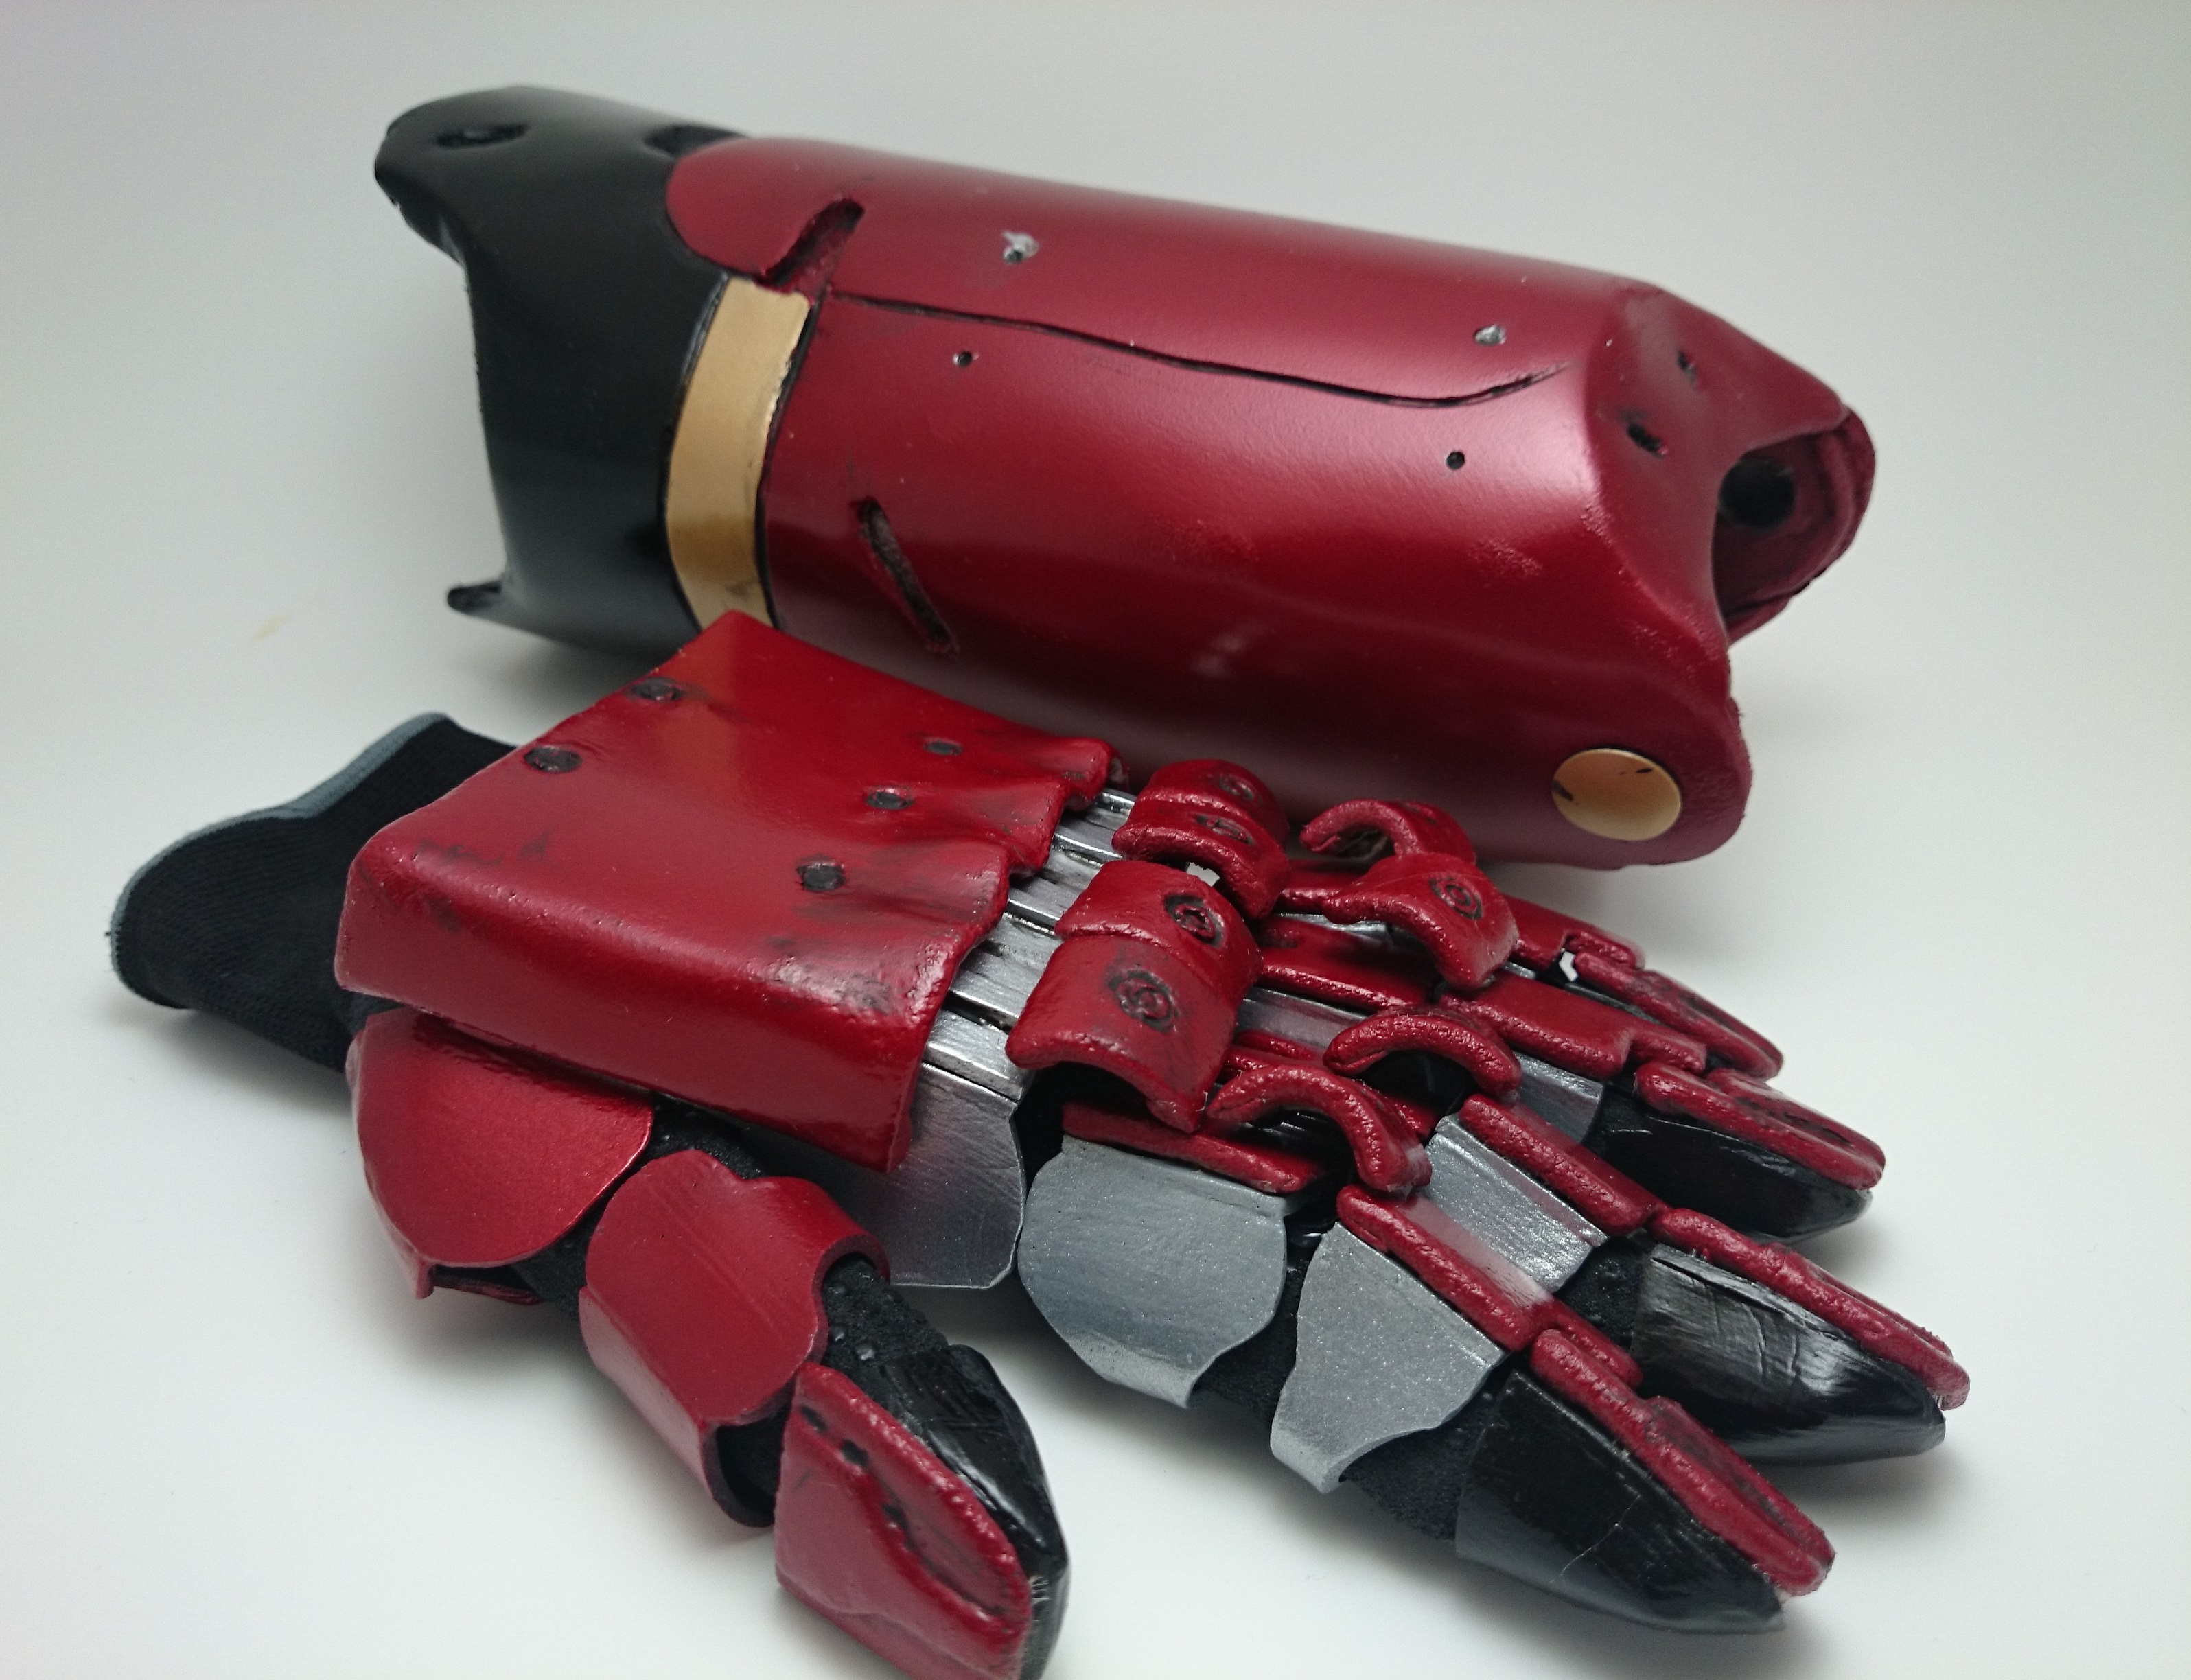
Completed worbla/foam hybrid arm
Shrapnel in forehead
I glued a few pieces of foam together till the piece was as thick as I needed it. I then trimmed out a rough shape of the shrapnel with some scissors according to multiple reference photos. I then heated scrap pieces of worbla to cover the foam. Since its just a piece of shrapnel, I didn’t do any sanding on this piece and just ended up priming and painting it.
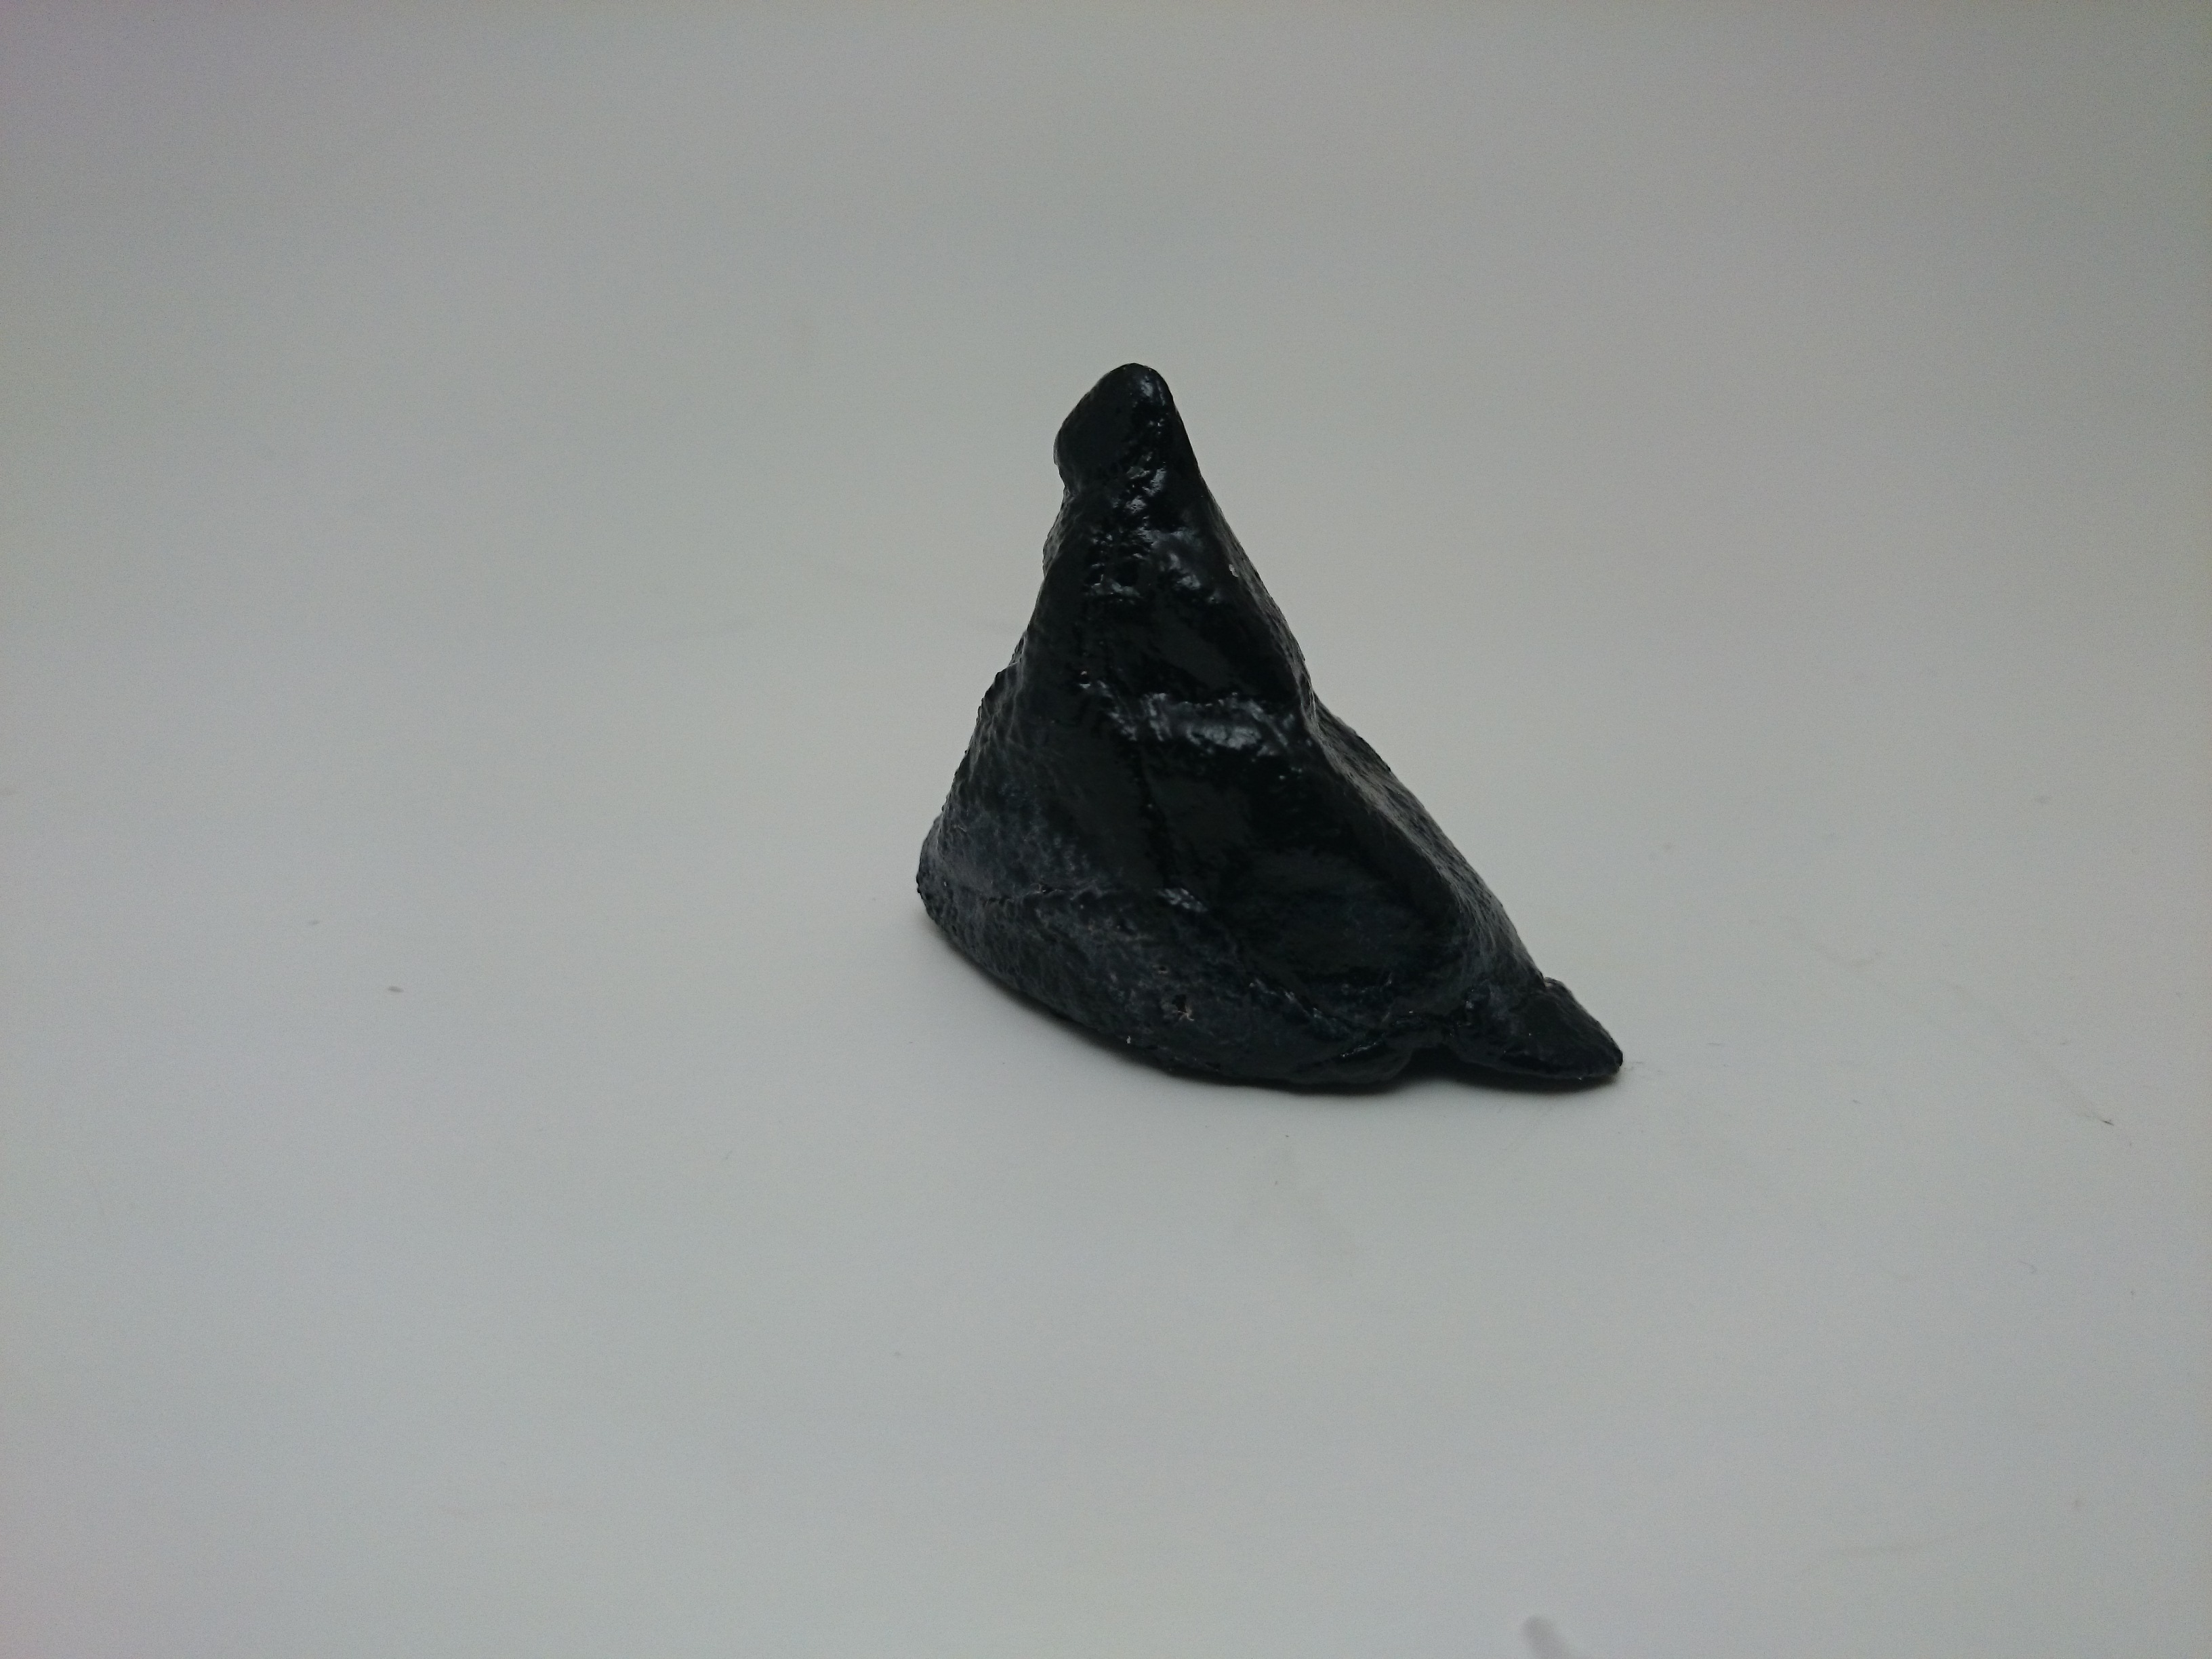
Shrapnel made from Worbla
*update September 4, 2015* I made a video tutorial on how to attach the horn and do basic makeup
In order to secure the shrapnel to my forehead, my friend recommended I use this silicone stuff called 3rd Degree which is typically used for simulating wounds and open flesh. I ordered mine here from Friend’s Beauty Supply. It comes in 2 parts that you mix together, apply, and it sets in about 10 minutes. You can look up tutotials on youtube on how to use it, but I personally used disposable cups and popsicle sticks to mix and apply the stuff on my head/shrapnel. After it dries, I used basic foundation and powder to try to blend it in a little bit.
And that’s it! Hope this write up helped. Don’t forget to follow me on Facebook and let me know if you have any questions.